A simple, strong alpine anchor
IFMGA Guide Marc Hanselman shared this anchor with me. Connect with Mark on Instagram, @pro.alpine
Provided you have strong, smooth rock, this anchor style could be a good choice.
Here’s what Marc says about this anchor:
“This is my permanent alpine anchor, where weight (remote setting), safety, longevity and clean pulls on the rap are at the forefront.
In solid rock the spacing between holes needs to be 10x the diameter of the hole, or about 4”. This accomplishments that.
Installation order is key: prebuild the anchor, drill one hole, hold anchor in place of the 1st hole, mark the 2nd hole and drill. If you attempt to assemble after bolts are installed, you could be in a pickle.
I believe this is the best solution for this scenario, where economy of gear is necessary and the anticipated amount of traffic is relatively low, compared to a sport crag. I call it the “alpine ferroutage” anchor”
A few things to note . . .
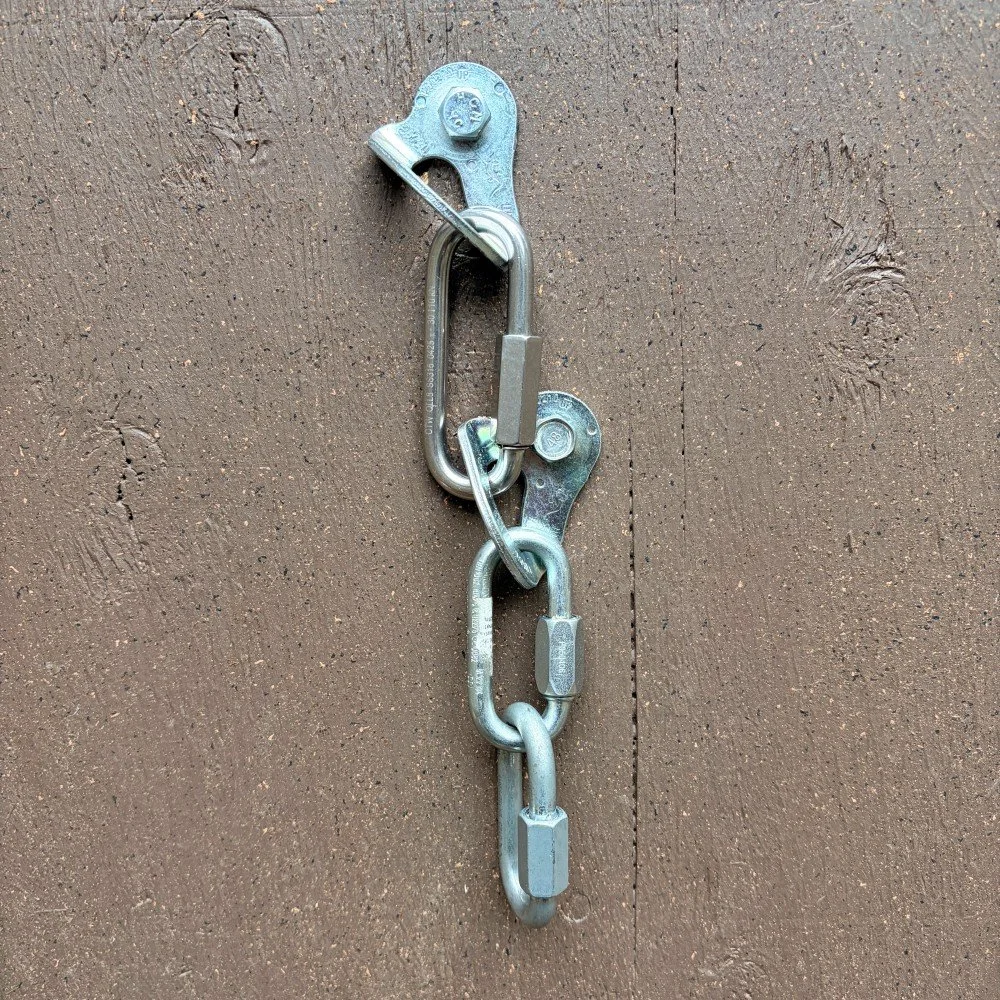
This anchor has redundancy, but not equalization. All the load is on the bottom bolt. The top bolt is a backup, in the highly unlikely event that the bottom bolt fails. It's called a series anchor. I have a detailed article on those; read it here.
Yes, the bolts are close together. With a 3/8 inch bolt, 4 inches (10x hole diameter) is about the minimum spacing. If you have a half inch bolt, you'd want about 5 inches of spacing, and this method is not optimal for that.
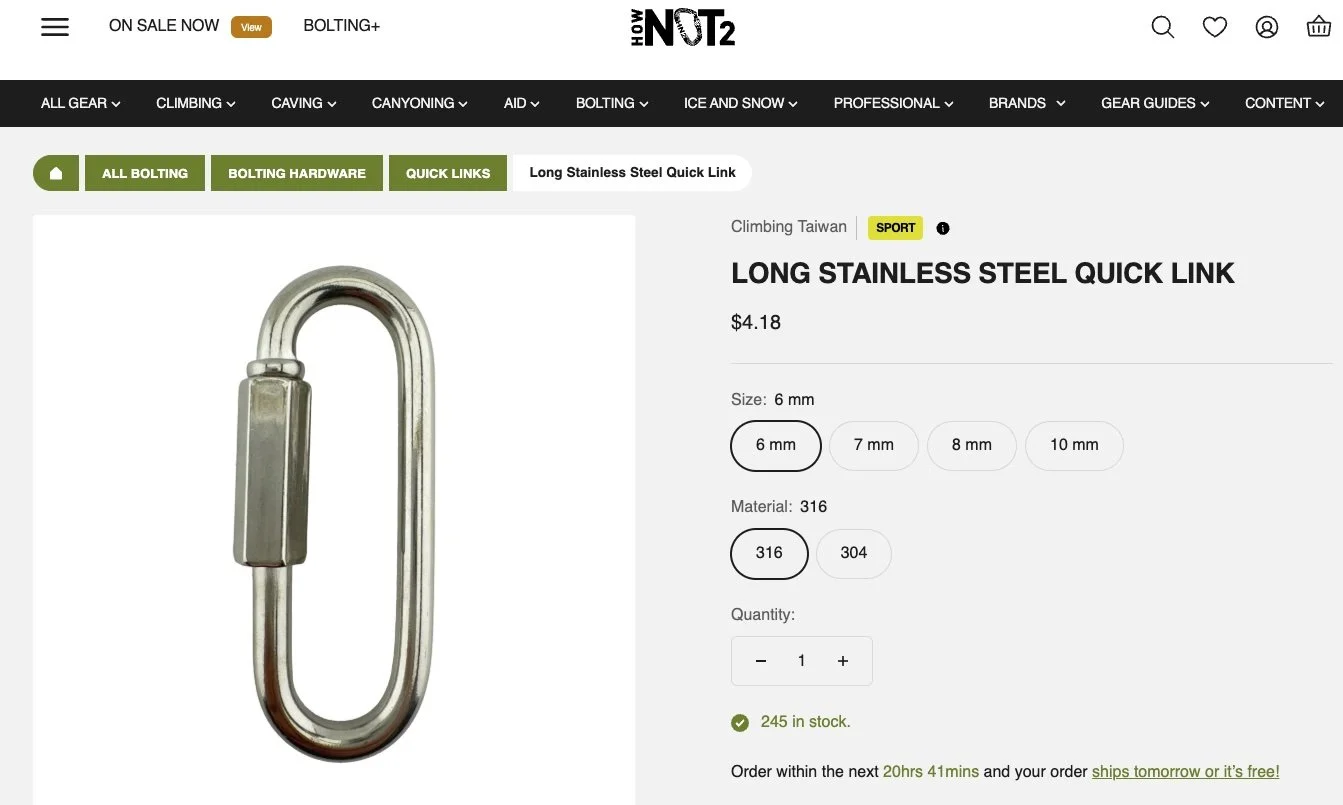
The top quick link is an 8mm long link. This gives that necessary 4 inch minimum spacing between the bolts. These can be hard to find; buying info is below.
There are two quick links on the bottom hanger. This second link hangs perpendicular to the rock, which gives you less friction and twists on the rope pull. The second link could also be a welded ring.
What's up with the name? Marc explains: “Ferroutage” means “piggyback” in French. It’s a nod to the origins of the idea - “Chamonix anchor” (as in my concept piggybacks on theirs) as well as the actual structure of the anchor (one bolts piggybacks on the other).”
If the rock was lower quality and you wanted the bolts farther apart, or had lots of bumps and protrusions, which might make it hard to get the spacing correct, you could try the “Chamonix anchor”. It’s similar to this, but instead of a long link connecting the two bolts, you have a length of 7 or 8 mm cord. This method, which is widely used in many parts of Europe, has it’s pros and cons. Here's my more detailed article about it.
Get long stainless steel quick links like this from HowNOT2.
These come in different sizes. The 6 mm is more than strong enough, they test somewhere around 35 kN. The 8 mm is slightly longer, which is what Marc prefers.