
Crevasse rescue: the drop loop 6:1

Premium Members can read the entire article here:
Do you want an efficient, simple and minimal gear mechanical advantage rigging system to pull your buddy out of a crevasse (or maybe your car out of the ditch?
Look no further than the drop loop 6:1.
Let's learn how to rig it.
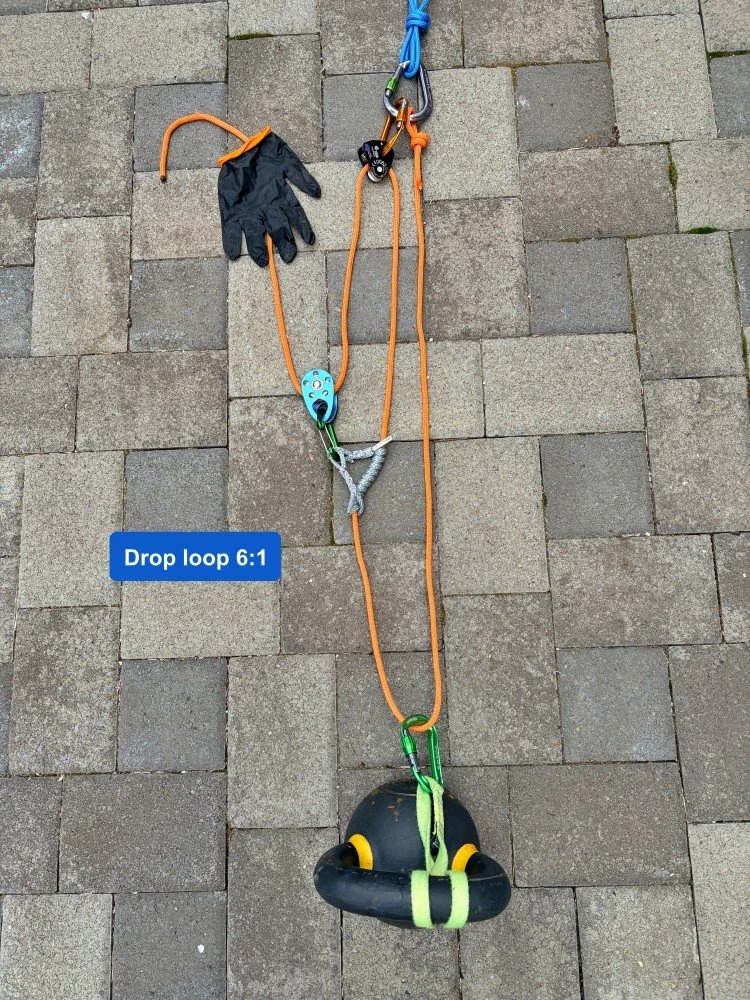
Gear you need for the drop loop 6:1:
A fair bit of extra rope you can use for the rescue. This could be the rope that you were tied in with when walking on the glacier, or an extra rescue rope that’s in your pack
Some sort of friction hitch, or rope grabber like a Petzl Tibloc
Some sort of progress capture system at the anchor, ideally a progress capture pulley like the Petzl Traxion
A few spare carabiners, two of them locking
A pulley if you have it (optional)
Notes . .
To keep the rigging easier to see, I’m not showing the original rope that might be attached to the unfortunate person in the crevasse. In this example, let's assume a team of two people skiing on a glacier unroped, and one of them falls in. Each skier is carrying a 30 meter rescue rope, so the person on top has all the gear to do the rescue.
One other benefit of this system: you’re dropping a new rescue loop to your victim. So, if the original rope they fell in on has brake knots in it, or is deeply entrenched in the lip of the crevasse, it doesn't matter.
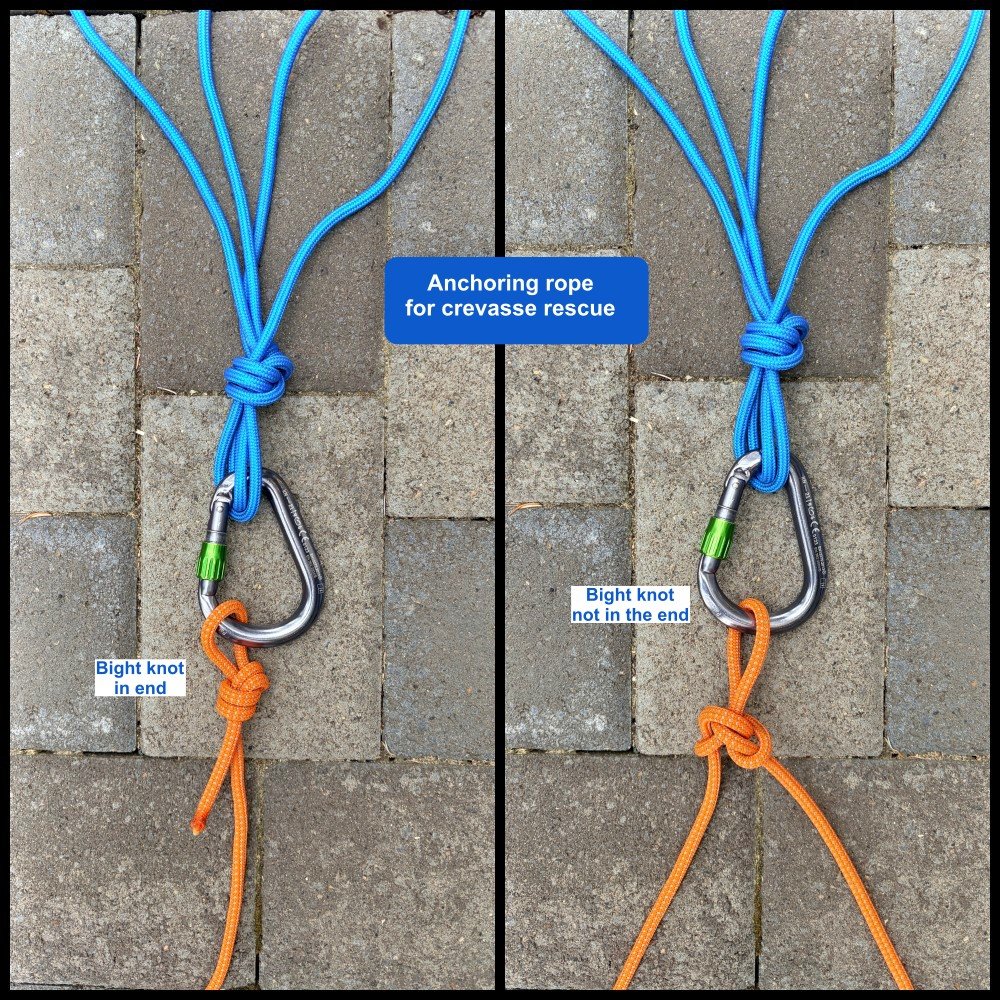
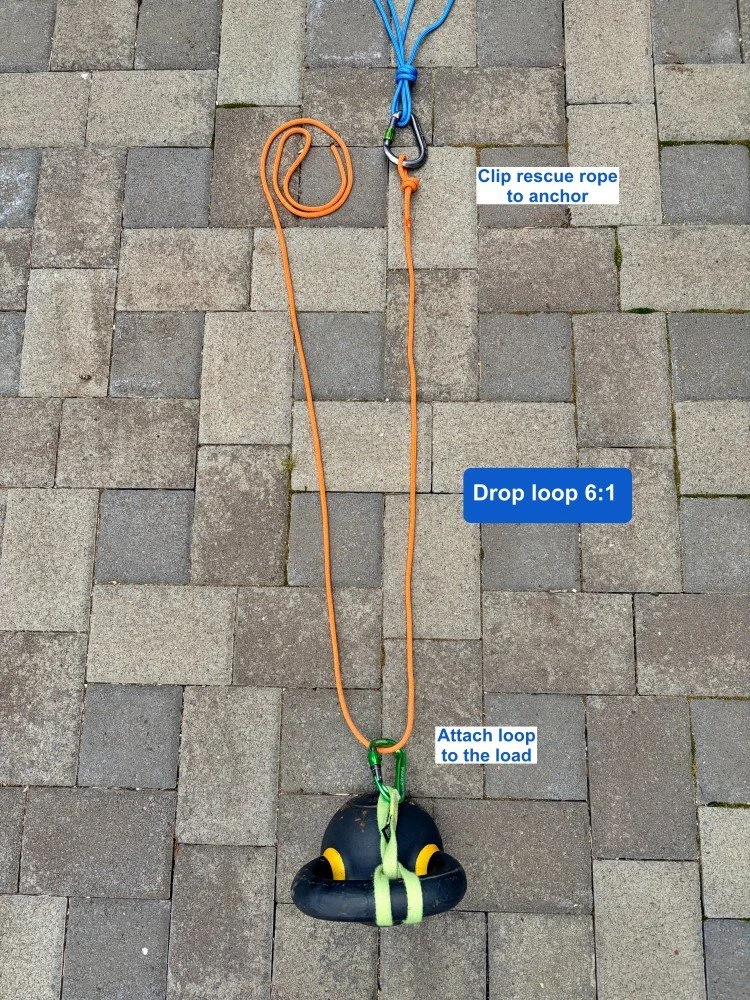
Step 1: Build a solid anchor, and attach the rope to the master point. This could be the end of the rope, as I'm showing in this example, or a bight knot that the person on top was clipped to.
Step 2: Clip a locking carabiner to the rope, and lower it down to the person in the crevasse. Instruct them to clip the locker to their belay loop.
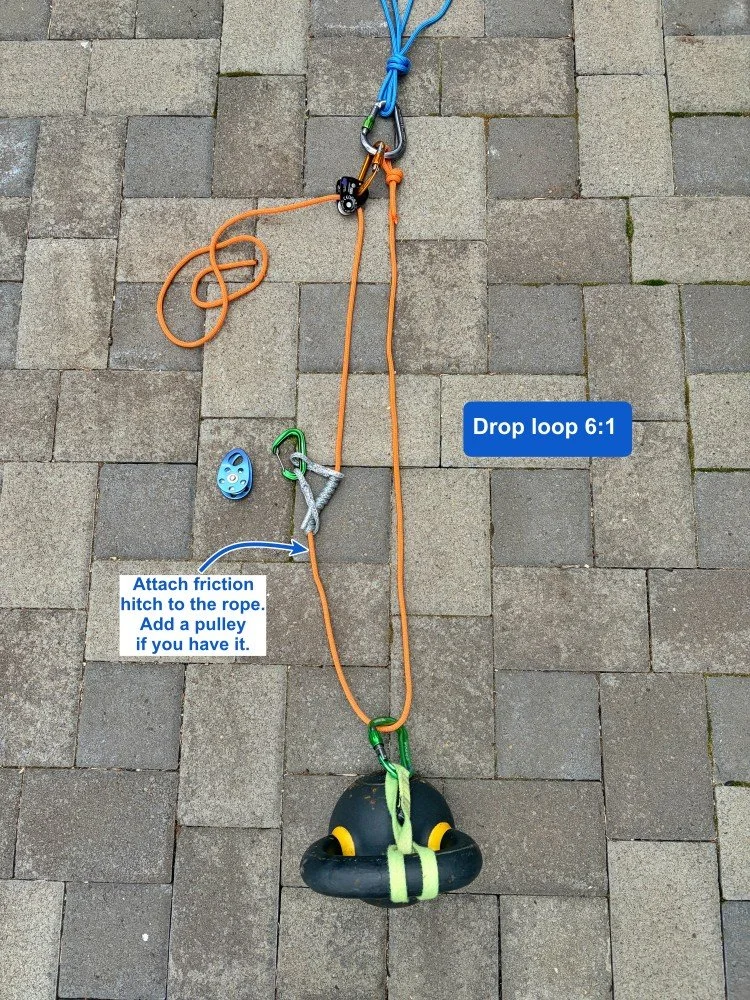
This is the “drop loop” portion of the anchor. If you have an extra pulley, you could put one here to reduce friction a bit.
For this to work as shown, you need to have a bit more than twice the amount of rope available to drop this loop to your partner. If you don't have that, you need to get resourceful with some other methods, such as the drop end 3:1 or the simplified drop loop 2:1.
Step 3 - Pass the other side of the loop that you dropped through some sort of progress capture on your anchor. A progress capture pulley (here, I’m using a Petzl Nano Traxion) is the easiest. You can also use some other options like a friction hitch on a carabiner; here's an article about different ways to do progress capture.
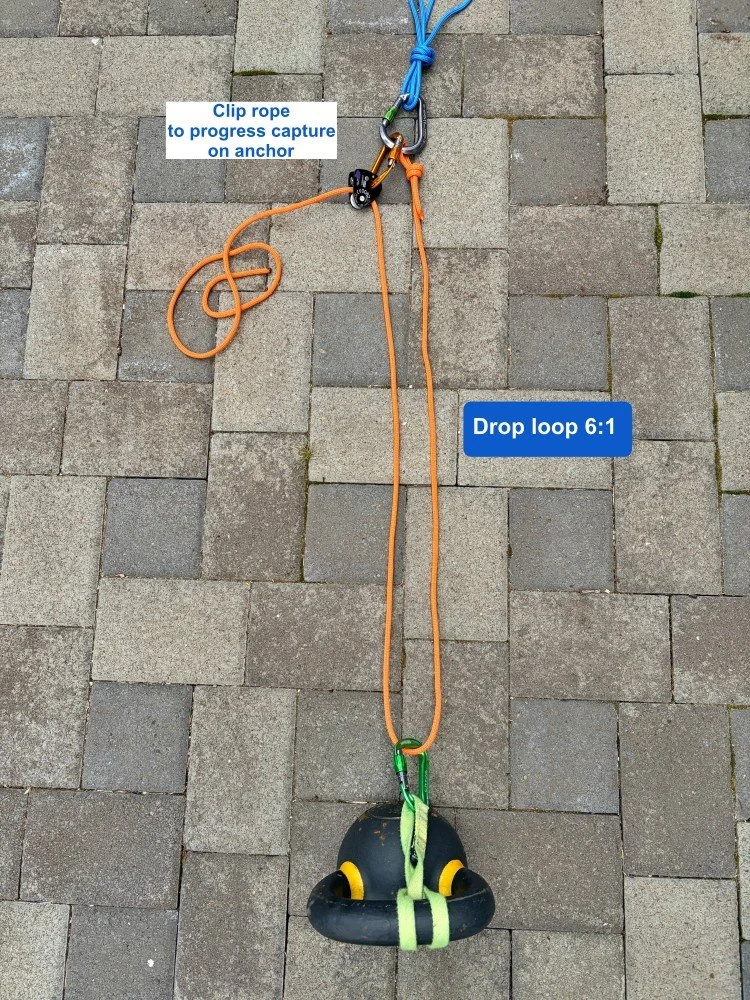
You now have a 2:1 mechanical advantage system, with the progress capture on the anchor.
If you have more than one rescuer, you might start pulling on this to see if you can move the load. (With hauling systems, it's usually best to use the lowest mechanical advantage that gets the job done, so try this first.)
In our case, let's assume that the you can’t pull up your buddy, so we need to add more boost to our system.
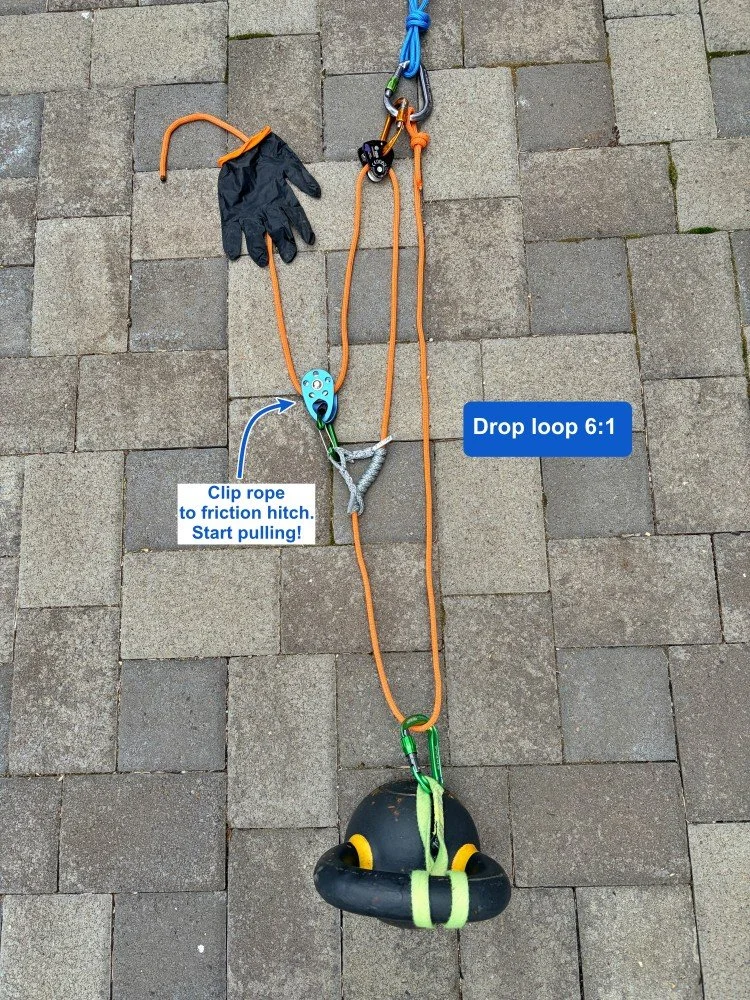
Step 4 - Tie a friction hitch to the side of the drop loop that’s coming up from your partner to the progress capture. Clip a pulley (if you have one) to the friction hitch. Clip the tail end of the rope to the carabiner / pulley on the friction hitch.
Give yourself a high five! You just built a 3:1 system on top of a 2:1 system, giving you a 6:1.
If you pull 6 meters of rope through your hauling system, your load will move 1 meter.
This is a compound pulley system.
What's the real world mechanical advantage of this rigging?
Wanna see a video of me going through the “T method” with this exact anchor to show the mechanical advantage?
