
Trees for climbing anchors: Part 1, Overview

Premium Members can read the entire article here:
Trees can be some of the best climbing anchors, whether it's for top rope, rappel, or multipitch.
This is a big topic, so I'm tackling it in four different parts:
Let's get to it.
How big does a tree need to be?
There's not a firm answer; it depends.
Is the (well-rooted) tree a single point anchor, or is it one of several points?
For a single point anchor, a good general rule is 12 inch / 30 cm minimum diameter at the base of the tree.
If the tree is one component of a multi point anchor, 5 inches / 13 cm base diameter is a bare minimum.
General guideline: if the tree is too big for your fingers to touch around it, it's probably gonna work for an anchor. More on that below.

How strong are trees?
Obviously there’s huge variability between species, diameter, and how well it's rooted. Often in alpine environments, a tree may be growing in gravel with a shallow root system, which is hard to evaluate.
Ideally, a tree is alive, has a reasonable diameter, and has solid roots going deep into good soil. Some people use the memory jog “5 and Alive” which refers to 5 inches at the base and healthy. (This doesn't help with the deeply rooted part.)
If you're using a deciduous tree in the winter after it’s dropped leaves, it might be harder to determine if the tree is alive or not. Ask me how I know this . . .
Some people advocate giving the tree a shake, or even kicking it. But I find this a little disrespectful to the tree so personally, I avoid it.
Warning, anchor nerd section ahead . . .
John Morton, a Seattle area rescue expert, examined different species of trees, of different diameters, that have been exposed to high winds and came up with the following table. Here's a longer article that discusses this.
In the graph, there's no legend, but I'm guessing that the magenta refers to anything under 28 kN and green is super strong enough for anything over that. These colors are geared more towards rescue / SAR applications; it's fine to rappel off of a tree that’s 15 kN, because the maximum load you're going to put on it will never be much more than 3 kN.
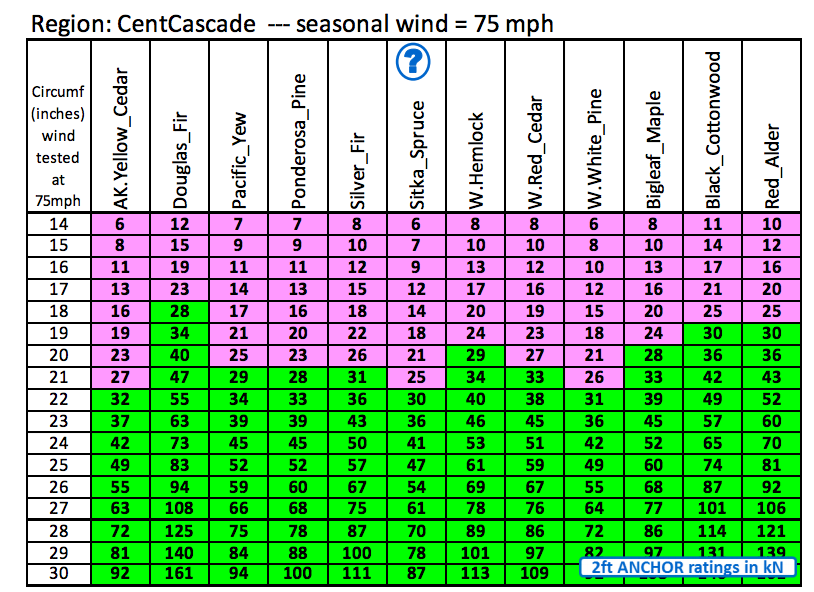
image: John Morton, from http://blog.alpineinstitute.com/2019/09/tree-ratings-in-kn.html
So, that's a pretty cool chart! For people like me who don't have any idea what 14 inches of circumference looks like, for me it's the diameter of the upper part of my calf just below the kneecap.
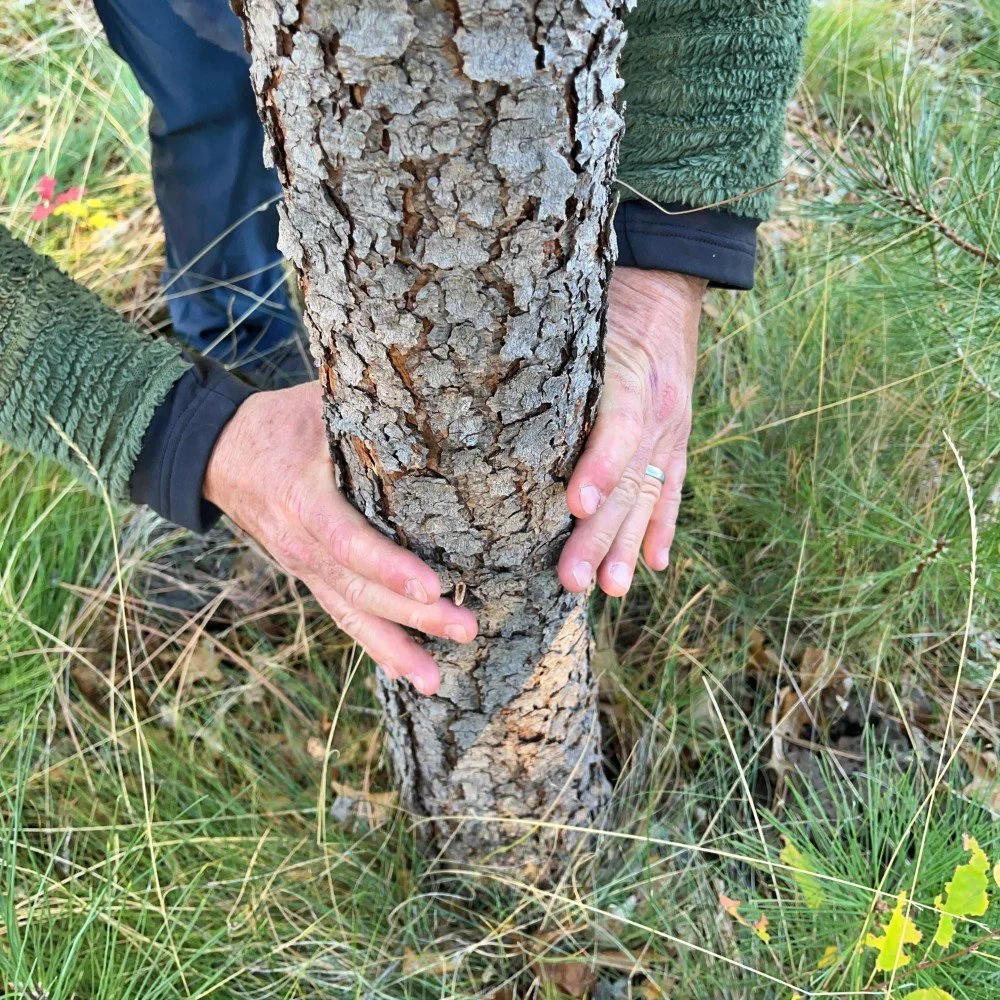
I have pretty small hands. If I extend my thumb and middle fingers on each hand to make a big “O”, that's about 16 inches. So, according to the chart, that means just about any tree that I can circle with my fingers is gonna give me between 9 and 19 kN, depending on species. That's certainly good enough for a rappel anchor, but. maybe not enough for a single point anchor.
(In the photo below, my thumbs are touching and my middle fingers are not, so all good.)
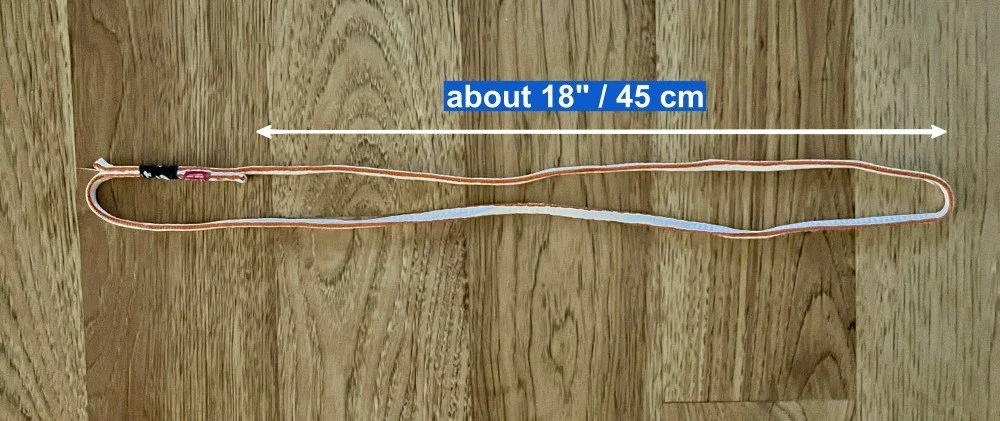
If you want something more objective than the size of your hands, a single length sling is about 18 inches / 45 cm from the stiching to the end.
Do I need to protect the tree?
Maybe. Conifer trees tend to have bark that’s thick and tough, while deciduous trees often have bark that’s thinner.
Climber inflicted tree damage typically comes from two sources:
Direct damage to the bark
Soil compaction and erosion around the base of the tree
When using a tree for an anchor, especially in a high use area, consider the material and how you rig it.
Small diameter cord or sling, especially if rigged with a girth hitch, might damage the bark.
1 inch tubular webbing (yes, old school, but can work great here) is a wider material, which can spread out the load.
Multiple wraps of material around the tree, such as a basket hitch, can also spread out the load.
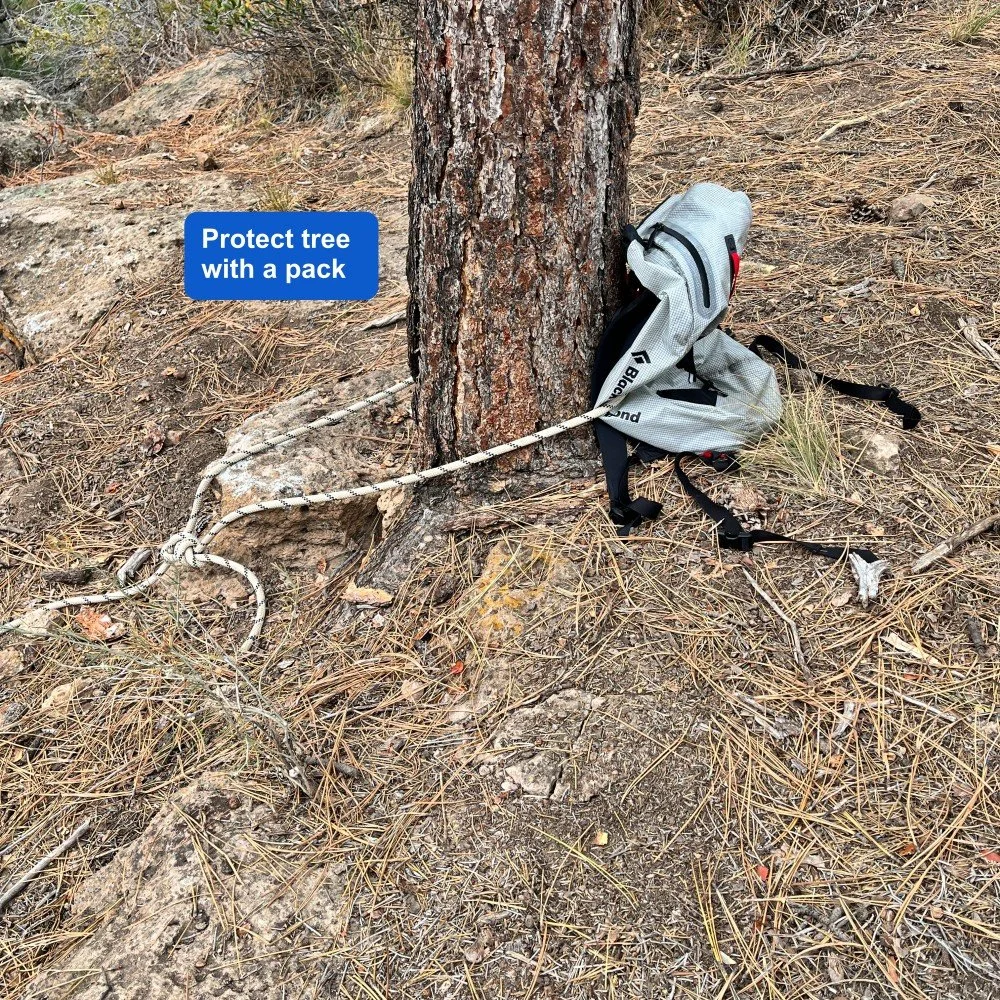
Some other methods to minimize tree damage include using some sort of scrap carpet, a floor mat from your car, or a backpack between the tree and your rigging. These often need encouragement to stay put over the course of the day, as they can fall down if the anchor isn’t under regular tension.
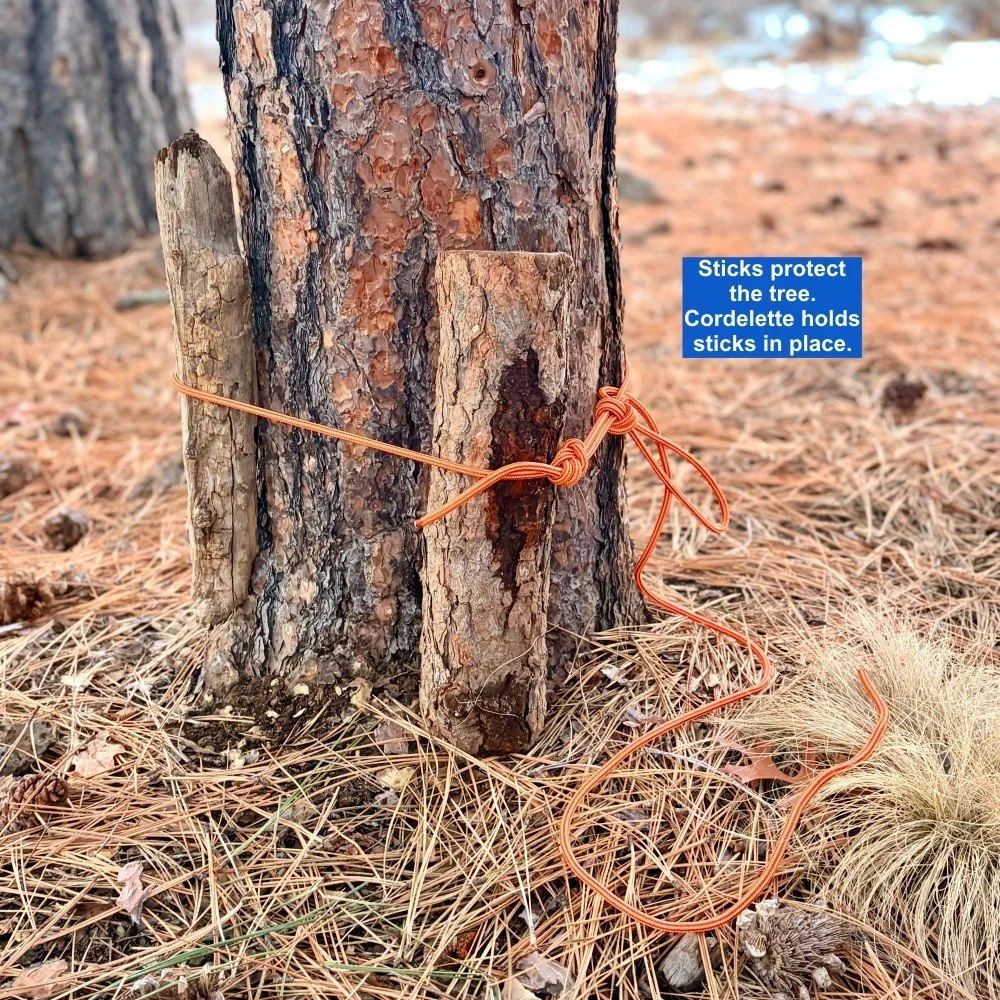
Here's another method that works pretty well. Take a couple of nearby sticks, and wrap a cordelette around the sticks to hold them in place. Now you can put your primary rigging around the sticks, and the tree should be fine.
Example of soil compaction and erosion around tree anchors, not good!

image: Christian Fracchia / Richard Goldstone, shared with permission
Are there any local regulations against tree anchors?
There are some climbing areas where trees are protected by law (or local tradition) and can’t be used for anchors. Or, they may require some sort of padding between rigging and the tree. Be sure and check about any rules like this in your climbing area.
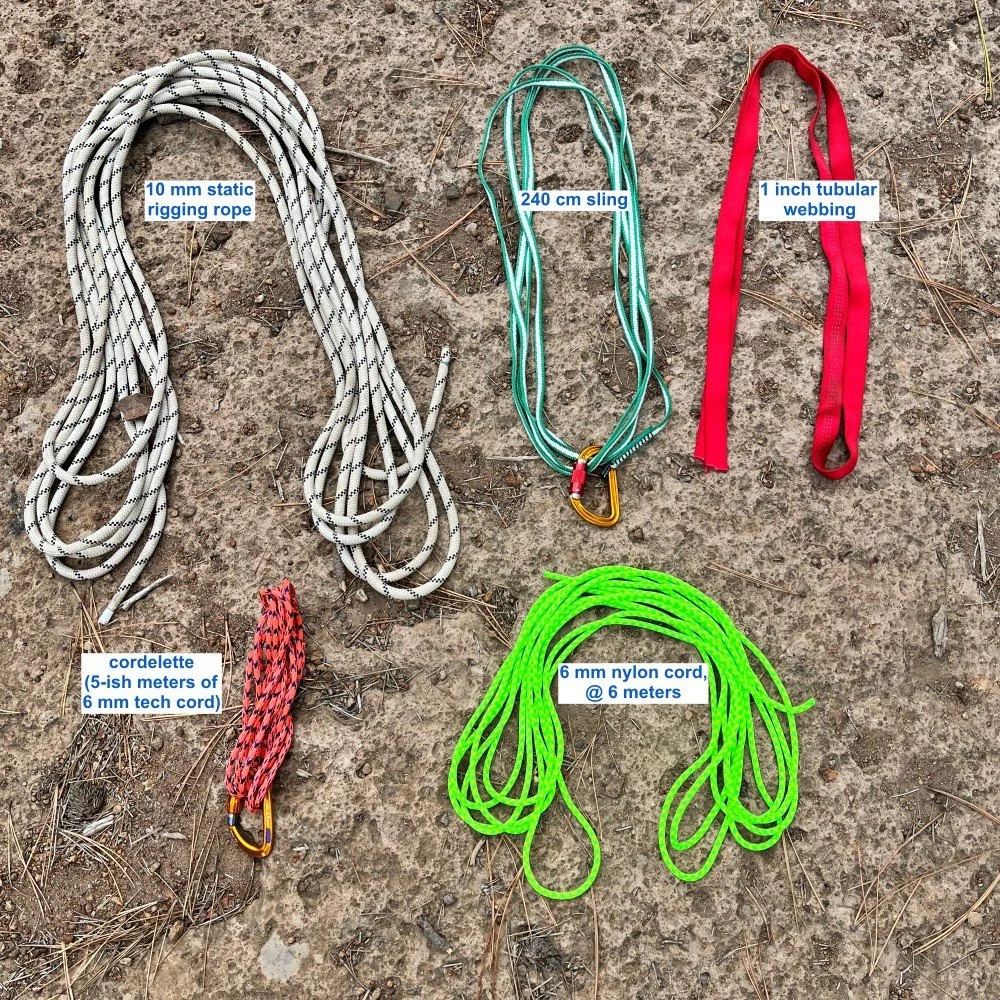
Materials for tree anchors
Here are some useful materials for rigging tree anchors.
Second rope only for anchor building, aka rigging rope
Sewn 240 cm / “quad length” sling (a 240 sling is great; get one if you build lots of tree anchors)
1 inch tubular webbing
Cordelette
5 or 6 meters of cheap 6 mm nylon cord
Your climbing rope (not shown)
Rigging methods for trees
When you're using cord or webbing, there are various ways you can attach it to the tree. Here are a few different methods, with pros and cons.
Girth hitch - Pros: fast, simple. The bend in the hitch can secure the sling in place on a tree to keep it from sliding around. Cons: making a bit of a pulley effect on the sling, not so great, increased load can damage the tree. Not redundant, Generally not a preferred option.

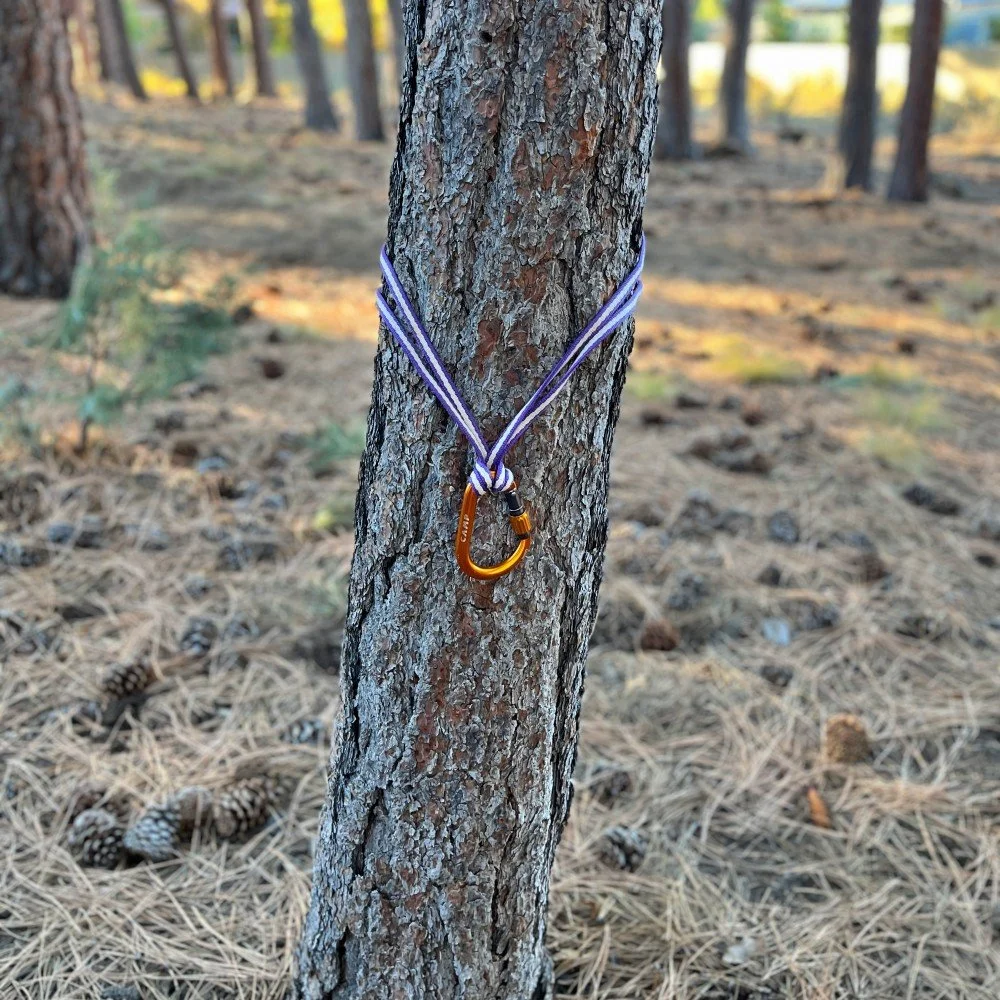
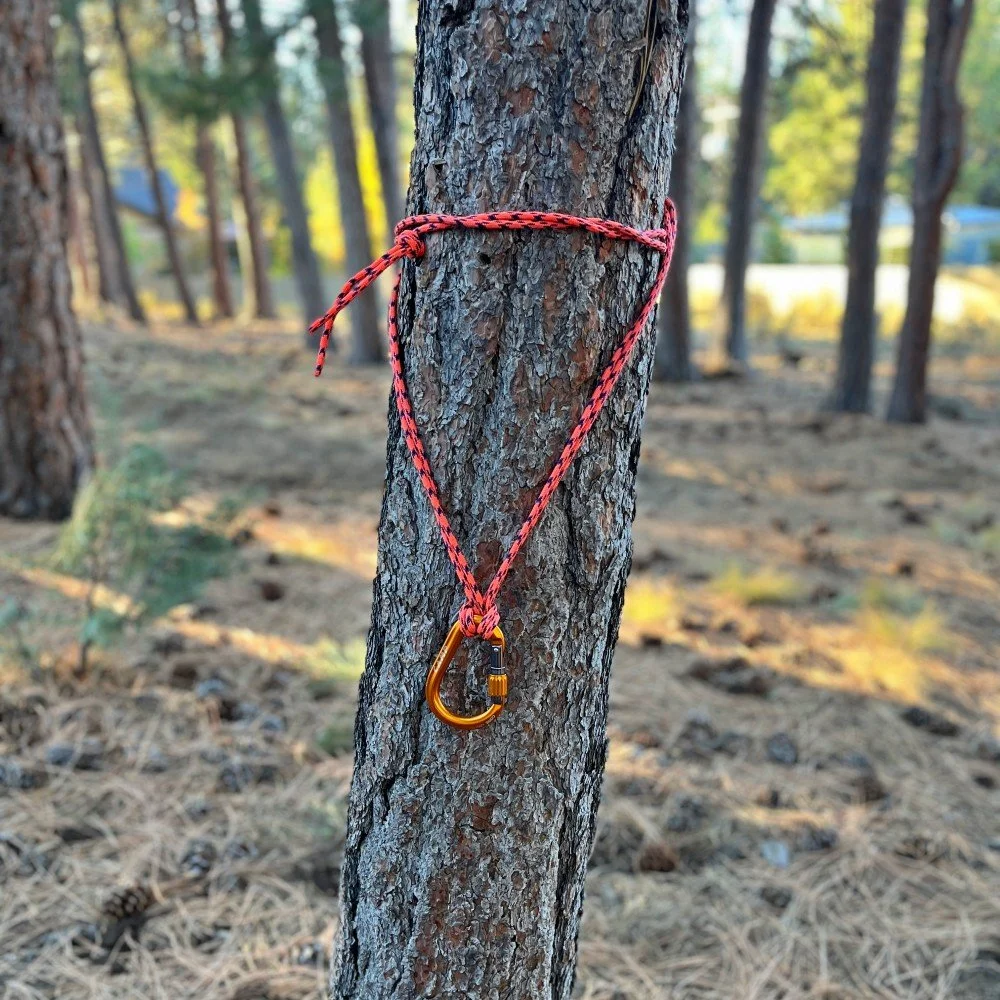
Loop(s) of tied cord or webbing - Pros: inexpensive, easy to check, good to leave behind for a rappel anchor. Cons: Single strand is not adequate for a belay anchor, takes a bit of time to tie, might need a knife to cut material the correct length. (In this example, the angle is a little wide; slightly longer material would be better.)

Sewn sling or cordelette, basket hitch - Pros: fast to rig, very strong, no knots to untie. Cons: not redundant, can slide down the tree.

Sewn sling, basket hitch with girth hitch master point: Pros: fast to rig, usually stays in place on a vertical tree without sliding down. Girth hitch at the master point makes it redundant. Cons: Can require a long cord or sling on larger trees, which you may not have.
Cordelette wrapped around tree, girth hitch master point: Pros: stays in place on a tree without sliding down. Girth hitch at the master point makes it redundant. Cons: Requires a cordelette, which you may not have.
Girth hitch master point (GHMP) often works better
Often with tree anchors, you'll find you don't have a long enough sling to tie a bight knot for a redundant master point.
The GHMP uses minimal material, making it easier to add redundancy to anchors compared to tying an overhand or figure 8. This is especially true with shorter slings and/or larger trees. I have a detailed article on the GHMP; read it here.
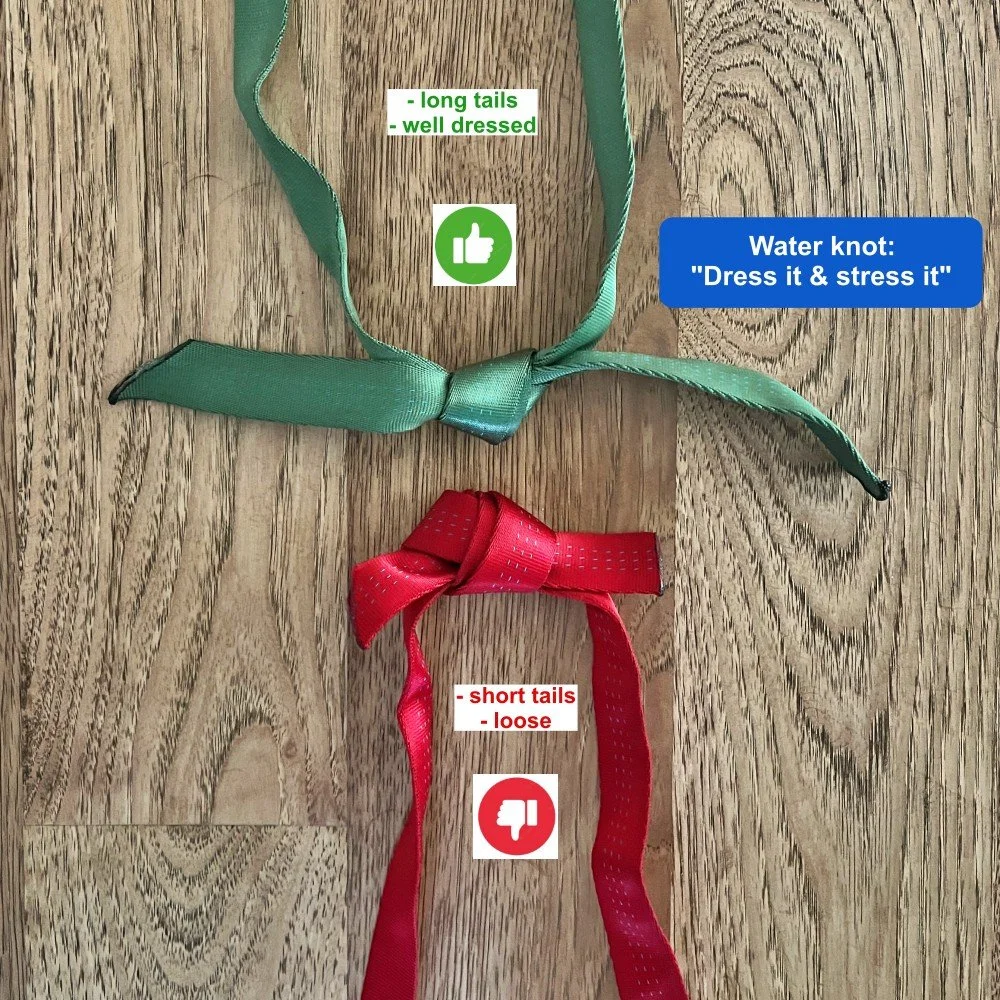
Caution on water knots
A water knot is a standard for joining webbing ends together and is perfectly safe when done correctly. However, if the knot isn’t dressed down tightly, and/or has short tails, some studies show that it might loosen over cyclic loading (being loaded and unloaded multiple times) which happens at a busy rappel station.
So, if you do use a water knot, tie it with long tails, at least as wide as your hand, and be sure to “dress it and stress it” thoroughly.
Here's a tip for making a knot difficult to untie, which is what we want in this case. Tie your water knot in webbing, get it wet, and then pull it tight as hard as you can. Or even step and bounce on it a few times if possible, which will load it with about three times your body weight.
Now, when it dries, it's gonna be welded in place. At a rappel anchor with webbing, that's a good thing.
Be careful of those dead nubbins . . .
A common mistake when putting a sling around a tree for an anchor is to think it's being held up by something secure, only to find it's draped on a dead twig about the size of a pencil. (I know this is common, because I seem to do it quite regularly.) If that twig breaks and the anchor suddenly falls/slides down the tree, that’s no bueno.
Much better option: put your sling around a solid branch that is clearly alive.

Reduce leverage: anchor low on the tree
Got an unquestionably strong tree? Great; it doesn't really matter where on the tree you build your anchor. Around head height is often convenient, as it gives you a nice high master point.
However, if you have any doubts about the strength of the tree, it's good practice to put your material closer to, or even on, the ground. This reduces leverage on the tree, so increases the strength of your anchor, and it makes it impossible for the rigging material to slide down the tree.
Like most things in climbing, there's a trade-off . Yes, you've increased the anchor strength by putting your material around the base of the tree, but it also might make it less convenient or ergonomic to use your anchor.
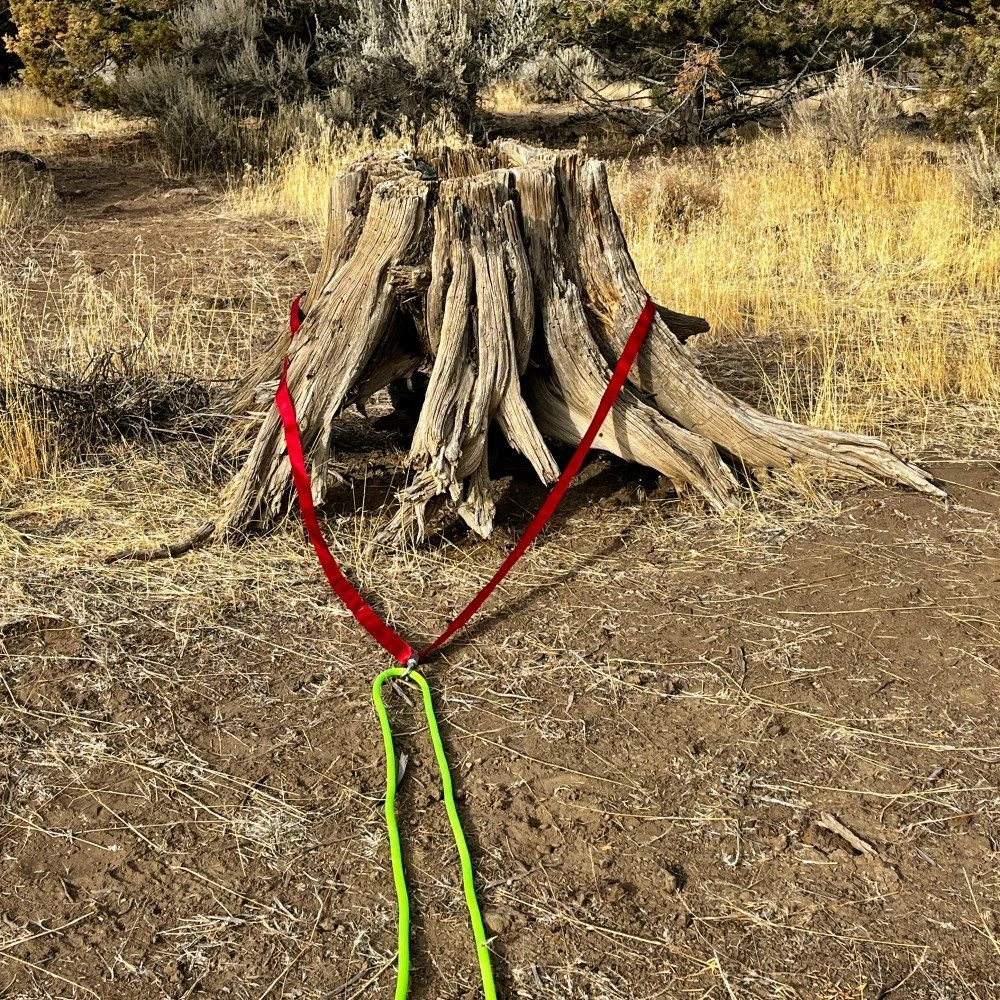
In the example below, the preferred way method on the left is both low down AND goes around both tree trunks, super strong.
On the right, the higher connection point may be more convenient, but you're using only one trunk, and increased leverage on the tree, so not as strong.

What if you have two small trees that are close together?
If you have to use a tree that's dripping with sap, what can you do?
What about the various flavors of “wrap and pull” anchors? Are those relevant for climbers?
