
Rappelling into the unknown

Premium Members can read the entire article here:
Some tips in this article came from collaboration with Adam Fleming. Adam is an AMGA Certified Rock Guide based in Utah. Connect with Adam: @adam.fleming.climbs, and his website.
I also posted this question on Mountain Project and got some helpful answers from a variety of people. I’m not going to credit all of them directly, but if you're reading this and see your words below, thank you!
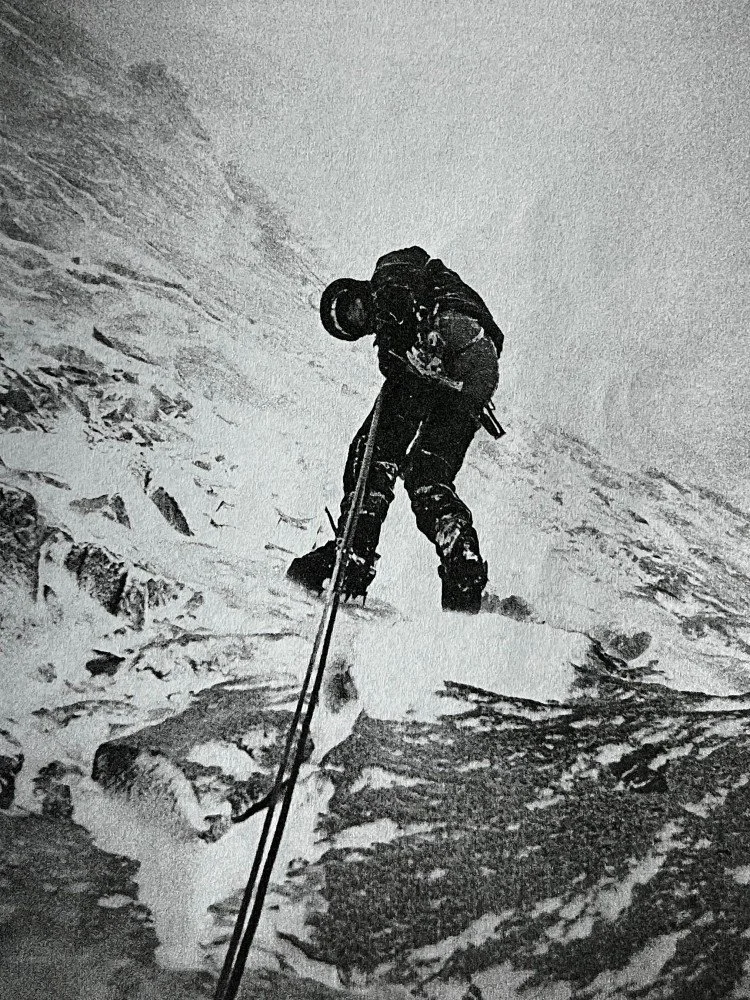
photo: Andy Kirkpatrick, from his excellent book “Down”, used with permission
All alpine climbers have to deal with rappelling down an unknown or unfamiliar route.
Maybe it's an established rappel route, but you don't know where the anchors are.
Perhaps you’re heading down a “non-standard” rappel route, and you know you're gonna have to deal with anchor building as you go down. (Also known as, potential epic in progress . . . =^)
Before we get into it, I'm gonna give a shout for Andy Kirkpatrick’s outstanding book on everything to do with getting down mountains.
Appropriately called “Down”, I consider this mandatory reading for any climber. (You can tell by the beat-up cover and the many bookmarks that I've read this many times!) Support your local independent bookstore.

Keep track of the big picture.
Whatever it is, it's easy to get drawn into the micro details of route finding and lose track of the bigger issues. As you descend, keep asking yourself these questions to keep track of the overall picture:
How far have we descended?
How far off the ground are we?
How long until dark?
How much gear do we have left?
First, let's have a look at the “established rappel route, but you don't know where the anchors are" situation.
Check the route topo, or any other source you might have access to, for descent beta. Are you looking for bolted stations or natural anchors? How long a rope do you need? Can you do it with one rope or do you need two? How many total rappels are there? Is it an older route that might have been bolted with a 50 meter rope that was standard at the time, or a newer route that might use something longer? Having an overview like this in your mind before you start down can help a bunch.
Rappel slowly, and expand your awareness to look down, left, and right. Try to think like the first person down the route making the anchors. Where would you put them? What's a logical spot, like ledges? Focus on those.
In soft rock, sometimes rope marks, or grooves toward one side, might tell you where the next anchors are.
If you come across a gear anchor that has a pre-equalized sling pointing to one side or another, that probably tells you which way you should be heading for the next anchor.
All existing anchors are guilty until proven innocent, especially if the route doesn’t get much traffic. Check everything you come across thoroughly. Be prepared to cut out old crap webbing and add your own good stuff.
Second, let's look at the more complicated situation: heading down a “non-standard” rappel route.
Examine the terrain (and the beta) before you commit
Practice making retreat anchors
First person down takes the rack
Use “block rappelling”
Consider lowering the first person
Be prepared to ascend the rope
Consider rigging with a Munter Mule Overhand (MMO)
Be ready to “extend” your rappel rope if needed
Dealing with loose rock
Look for natural anchors
Can you downclimb?
Can you traverse to another better rappel route?
Consider the “shiver bivy”
Leave the rope
Examine the terrain (and the beta) before you commit
If you commit to going down a gully, or side of a ridge line, you may be very attached to that choice. So think carefully before you do it!
Personal story: Coming off the summit of Mt. Thomson in North Cascades of Washington, my buddy and I saw a perfect rappel anchor on a stout tree that headed off down a gully. We rigged it, rapped it, pulled the rope . . . and realized a minute or so later that we were definitely off the standard route. A very sketchy traverse got us back to safe ground, but it was NOT fun!
We followed someone else's error instead of reading the topo / route description, which would've (correctly) told us to continue on the ridge another 50 meters or so to a short and easy rap.
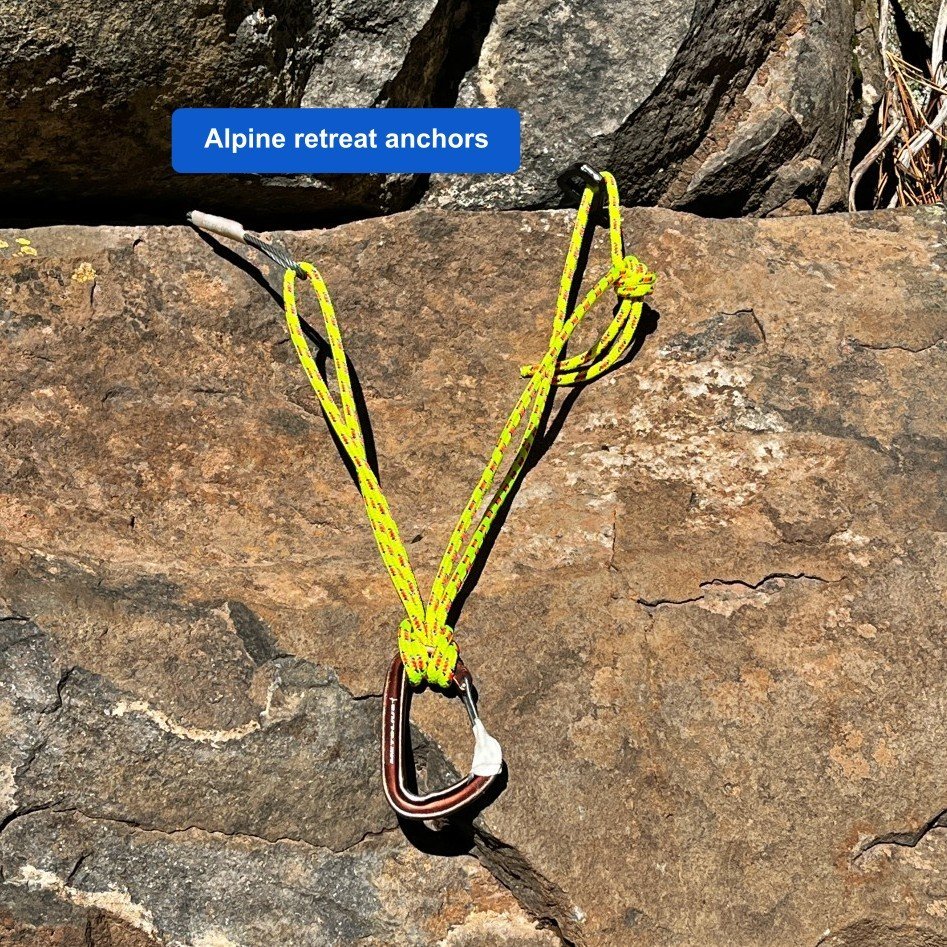
Practice making retreat anchors
There are a few special techniques you can pull out of your #CraftyRopeTrick toolbox when you need to build rappel anchors.
I cover lots of them in my articles on alpine retreat anchors, Part 1 and Part 2.
Bring 6-ish meters of 6 mm cord in the bottom of your pack, and/or be ready to cut up your cordelette.
Bring a knife.
Wrap a bit of athletic tape around the spine of a few of your least favorite carabiners, to leave behind as your masterpoint as a “cheapskate locker.”
Here's one method to equalize two placements for a retreat anchor: Stopper and a piton, about 2 meters of 6 mm cord, flat overhand bend to connect the ends, girth hitch master point, cheapskate locker: good to go!
Practice alternative anchor techniques like this on the ground before you ever have to use them for real.
First person down takes the rack
The first person down might well have to make their own anchor, so it makes sense that they should have the rock gear with them, and most of the extra cord / webbing, and a knife.
If you're doing this in the dark (extra bonus points!) give the best headlamp to the first person down.
Use “block rappelling”
Block leading when going up means the same person leads several pitches in a row, rather than alternating leads every pitch. This can also be a good practice when rappelling multiple pitches. Typically this will be the most experienced person, but not always. This allows one person to have all the gear that they need and not be handing it back-and-forth, and to get into the mindset of focus, efficiency, and minimizing risk.
Consider lowering the first person
The first person down might need to pendulum back-and-forth to reach an appropriate anchor, build a new anchor, or climb back up the rope if they go too far. For all of these situations that require use of your hands, it’s probably less risky for them to be on a proper belay from the top.
This can also be helpful if you’re heading down with lots of loose rock around you, because anything you kick down can't fall and potentially damage the rope that's below you.
Here’s a much more detailed article I have about lowering your partner.
There are a couple of ways to lower your partner.
The simplest: lower them on one strand. Of course, this requires solid communication so they don't get lowered too far. Might be a good place for some radios, or at the very least good visual line of sight.
Another option is slightly more complicated but gives sort of the best of both worlds. You can tie off the middle of the rope at the anchor to isolate each strand, have the climber rappel single strand while being belayed on the other strand. This gives the rappeller full control over where they stop, with the security being on belay from above so they can go hands-free to swing around, build an anchor, climb up the rope, etc.
A bonus for this method is that the second strand of the rope is carried down by the first person, with no chance forward to get tangled, blown around, etc.
Be prepared to ascend the rope
If you need to go back up the rope for any reason, it's good to rig in advance to make this as easy as possible. As mentioned above, if you’re rapping a single strand with a Grigri, ascending a rope becomes quite a bit easier.
There are several ways to do this, I cover them in this article.
If you’re rappelling double strand on an extended rappel device, here's a simple technique that allows you to ascend the rope, covered in this article.
Carry a friction hitch or two (especially one that slides easily like a Sterling Hollowblock) and be ready to use it.
Consider rigging with a Munter Mule Overhand (MMO)
In some cases, such as if you think you might need to rappel more than half the length of your rope, rigging with an MMO on the top anchor can be a great idea.
Doing this allows, the first person down to rap single strand, with the rope locked off at the top by the MMO.
If the first person down finds an anchor before they get to the end of the rope, great.
If they don't, their partner up top can release the MMO and lower them down on a the Munter hitch a bit more until they hopefully find an anchor spot.
If the first person went too far, and they can climb up a bit, the Munter allows them to be easily belayed up.
If you anticipate doing this, the first person down should be tied into the end of the rope rather than relying on a stopper knot.
So now what happens to the person up top? That's the next tip!
Want to learn more tips about descending an unknown route, such as:
“Extending” your rappel rope
Dealing with loose rock
Look for natural anchors
Can you downclimb?
Can you traverse to another route?
Consider the “shiver bivy”
Leave the rope
