

Premium Members can read the entire article here:
Note - This post discusses techniques and methods used in vertical rope work. If you do them wrong, you could die. Practice vertical rope techniques with a qualified instructor, and ideally in a progression: from flat ground, to staircase, to vertical close to the ground before you ever try them in a real climbing situation.
These diagrams are from the online big wall class from Vdiffclimbing. It's a great class with lots of tips and nice drawings like this, highly recommended. Diagrams are shared with permission.
Are you descending from a climb with a heavy haul bag or multiple packs? Rather than rappelling with them, (aka “riding the pig”), it may be easier to set up a sort of tensioned “zipline” and lower the pack(s) on that.
This can be especially helpful if:
The bags are really heavy
The next anchor is across a traverse and/or beneath a roof
You're close enough to the ground to lower them there in one rope length
I've done this canyoneering to get packs down a waterfall and across a pool, and it works great. (You can even do it with real people, check out the video at the bottom!)
Note: This works best if the route is steep. If the bag gets hung up anywhere when you’re lowering it, you could have some problems.
Here's one way to set it up. (You need two ropes minimum.)
1 - Fix one rope to the top anchor. Be certain that top anchor is stout, because it probably is going to get some extra force. Leader rappels single strand on this rope.
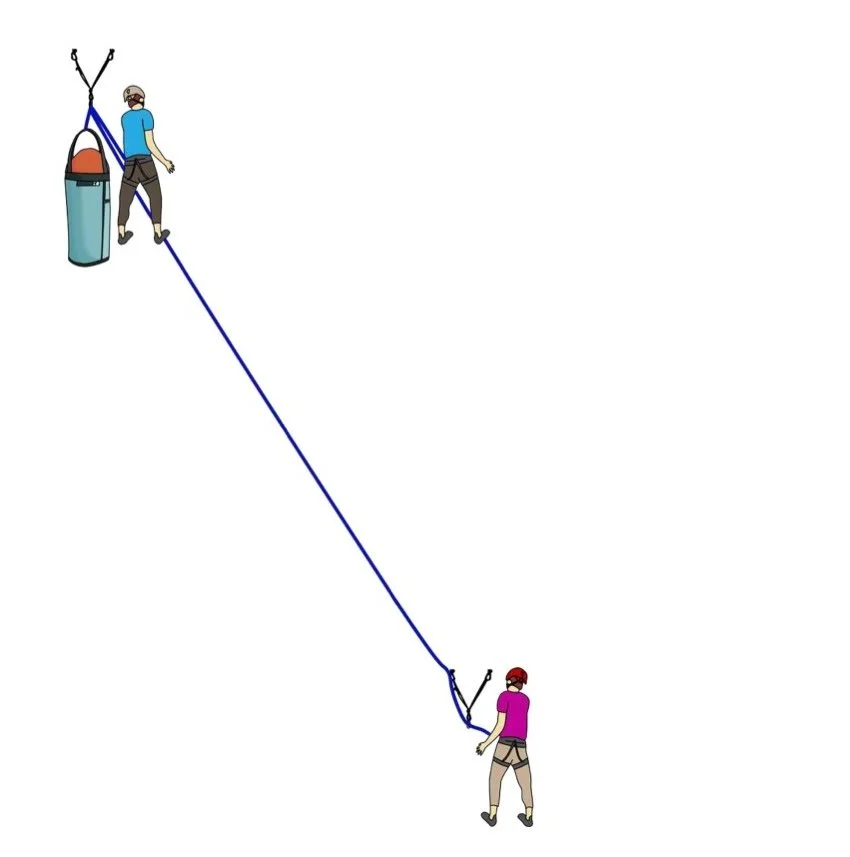
image: https://www.vdiffclimbing.com/bigwall/, shared with permission
2 - Pull slack out of the rope, and tie it off. If the terrain is steep, and the lower anchor is pretty much below the top anchor, then that's the best set up.
However, if you have something that traverses, or where the rock isn’t so steep, you might want to tension the rope and tie it to the lower anchor with some sort of releasable system.
You have several options. You could tie a Munter Mule Overhand (MMO). Another way is with a Grigri or guide plate style belay device on the lower anchor. Do NOT use a toothed progress capture pulley like a Traxion for this, you may shred your rope!
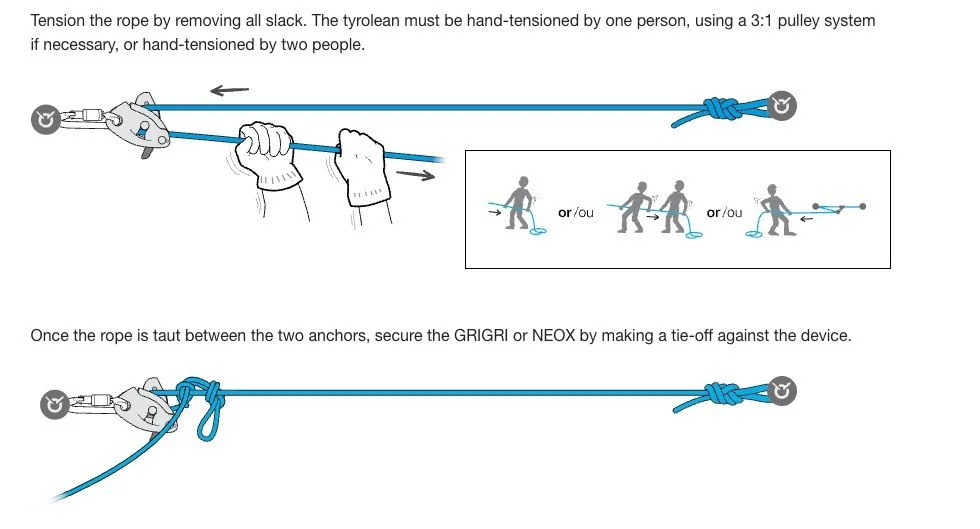
3 - Clip the haul bag to the tensioned rope with a couple of locking carabiners.
4 - Attach the end of the second rope to the haul bag. You can do this with a locking carabiner or a retraced figure 8 knot.
5 - Using the second rope, lower the haul bag directly from the anchor with a munter or super munter. Gloves and a third hand autoblock highly recommended.
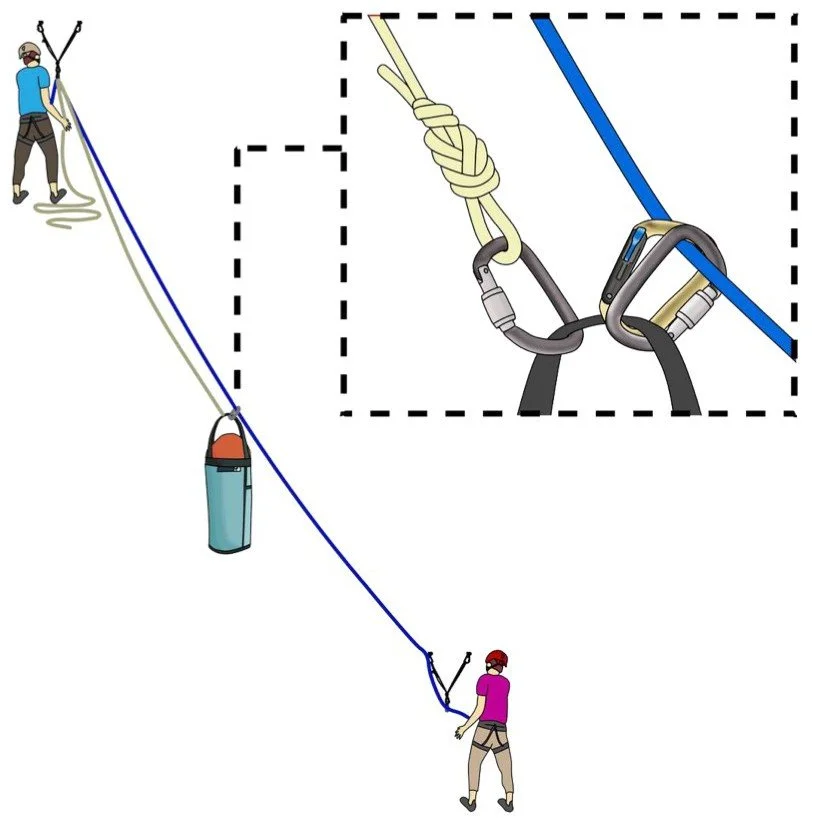
image: https://www.vdiffclimbing.com/bigwall/, shared with permission
6 - The leader securely docks the bag to the lower anchor. Then, they release the tension on the (blue) rope, while keeping it tied to the anchor.
7 - Now the second can rappel. They can pull up the blue rope to the midpoint and rap on that (if it's less than half a length to the next anchor) or tie both ropes together for a double rope rappel if necessary.
If you're on a big wall and have a third rope / tagline, how can you rig this to make it even easier?
What's a potential problem if you have a lot of tension on a rope with a Grigri as the progress capture?
Want to see a video of this in action with a real person?
