
Alpine Tips

Gear Breaking, Italian Style
You don't want to break your equipment, but it sure is fun watching other people do it! Check out this great video from the Italian Alpine Club, which shows testing and breaking all different kinds of climbing gear. (The original was in Italian; I paid to have subtitles added.)
Let's get one thing straight. The CAI has a terrific logo. =^)

Click below to watch the video.
As climbers, we never want our gear to break. But it sure can be fun watching people do it in the lab!
The Italian Alpine Club (Club Alpino Italiano, or CAI) founded in 1863, is the second oldest alpine club in the world. They have been doing gear tests like this for more than 50 years. They made a terrific video showing all manner of testing and destruction - ropes (both sudden drop test and slow motion steady pull, with and without knots), slings, carabiners and harnesses. Also, various tests of the flat overhand bend, with different combinations of rope material and diameter. Girth hitch? Yep, we got that too.
Lots of these gear testing videos are in the original language, often Italian or German. I paid to have subtitles added to this video so this important information could be brought to a wider audience. (That's why it's on my YouTube channel, but all content is from the CAI.)
Note, the units in this video are the kind of unusual “kgf”, or “kilogram force”. This is different than the more commonly used kilonewton (kN), which has a climber you are hopefully familiar with.
Fortunately, the math conversion is easy: simply move the decimal two places to the left for an approximate conversion to kilonewtons. For example, if something in the video broke 1268 kgf, move the decimal place to places to the left and you get around 12.6 kN. (technically it's about 12.4, but hey I'm not an engineer and that's good enough for me.)
Yep, they tested Dyneema girth hitches.

Plus the flat overhand bend, in lots of different combinations of material and diameter.


Pocket Fresnel lens for the small print
Carrying a credit card sized Fresnel magnifying lens can really help with reading the small print on a map or your phone. Good news, they weigh pretty much nothing, have 3X magnifying power, and cost about $1 each.
So, the way I heard the story . . . Several older and experienced hikers were hiking in the Columbia River Gorge. As light was fading, they needed to make a route choice at a trail junction. They pulled out their map . . . and couldn’t read it because no one had reading glasses! They didn’t know where to go, and decided to stay put for the night. (That was probably the best choice, and luckily they had the gear to do so in reasonable comfort.) The next morning, when there was enough light to read their map, they walked out unassisted.
For more “well seasoned” climbers, reading the small print on a map or phone screen can be tricky. But who wants to bring reading glasses on a hike or climb?
A lightweight, inexpensive, and functional solution is a pocket Fresnel (pronounced fruh-nel) magnifying lens.
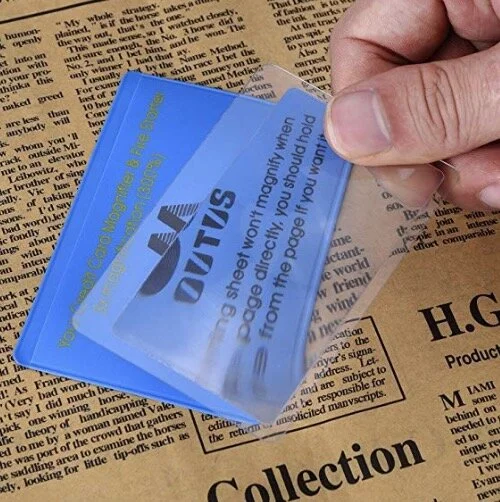
image: https://www.amazon.com/Outus-Plastic-Reading-Magnifier-Firestarter/dp/B06W5FCS4Q/
These little puppies are simply thin, flexible, plastic magnifying glasses. About the size of a credit card, they are dirt cheap, magnify to about 3x power, and really help to read that 8 point font. (The image clarity is not as good as what you’d get with a lens actually made of glass, but it’s probably good enough to read your map and make the correct trail choice.)
If you want to show off your bushcraft skills, they can apparently be used in a pinch to even start a fire, provided you have steady hands, perfect tinder, and bright sunshine. (Disclaimer, I have never done this, your mileage may vary, and YouTube is your friend.)
You can get a multi-pack of pocket magnifier lenses online for something like $1 each. So, buy a bunch, keep them scattered around your gear bags, and give ‘em away to your friends. Search Google for “pocket Fresnel lens”.
Science geek note: the Fresnel lens was invented by a French physicist in the 1800s, and was originally used in lighthouses to concentrate the light beam. Several excellent examples can be seen at historic lighthouses, including several in Oregon. When seen full size in a lighthouse, they are quite amazing!

Fresnel lens in Cape Mendocino lighthouse, California. Image: Wikipedia

Backup battery and charging cable - the 11th Essential
If you bring electronics in the backcountry, (smartphone and GPS app), it's pretty much mandatory to carry an extra power source. Here’s a great choice, at about 3 oz and $20.

Phones, watches, satellite communication devices, rechargeable headlamps . . . Most of us are carrying more important electronics into the back country, so it's crucial to have a means of charging them.
While always putting your phone in airplane mode at the trailhead to save battery is good practice, having some backup power is inexpensive and lightweight.
Here’s a very detailed article I wrote about battery saving tips in the back country.
Some people only will take an auxiliary battery on a multi-day trip. That works great provided you remember to charge your phone fully in your car driving to the trailhead, but that is a little task that's easy to forget. For me, it's more reliable to just carry a fully charged extra battery and cable as standard practice.
Anker and Nitecore makes great auxiliary batteries in a variety of sizes. With the larger batteries of modern phones, probably 5,000 mAh is the smallest you want to go, which should give you one full charge. (Geek note: “mAh” means milliamp hours, a way to describe battery capacity.)
The photo above is a few years old; now I'm using a 5000 mAh battery. but you get the idea. (Sharpie pen shown for scale)
If you're going on a longer trip, sharing your battery with partner(s) or don't mind carrying a little more weight, go with a 10,000 mAh battery. That can last last one person up to a week.
I like having both - a small one for short term emergency backup, and a 10,000 for longer trips.
A small auxiliary battery and charging cable together cost about $20, and weigh 3.5 ounces / 100 grams. Personally, I consider a battery and charging cable the 11th essential, and carry this tiny additional weight with me on every trip.
Cables . . .
iPhone Lightning. USB-A. Micro USB. USB-C . . . Aaaaaargh!
We all know that having 4+ different flavors of cables is a hassle! This is especially true when you're trying to minimize your gear. Let's hope the move to USB-C as a standard happens fast!
You can get a tiny 4 inch long charging cable for your iPhone; no need to bring the long cord you use at home. I'm sure there's one for Android folks as well.
Tip: cheap charging cables can get damaged getting banged around in your pack and fail when you most need them. Try to buy cables that are a little more durable, and consider bringing two of them on longer trips, they are inexpensive and extremely lightweight.
If you search online, you'll find loads of different battery options, many from off-brand companies. I’ve tried a few of these trying to save a few bucks, and been disappointed. I recommend you pay a tiny bit more and get a name brand like Anker or Nitecore.
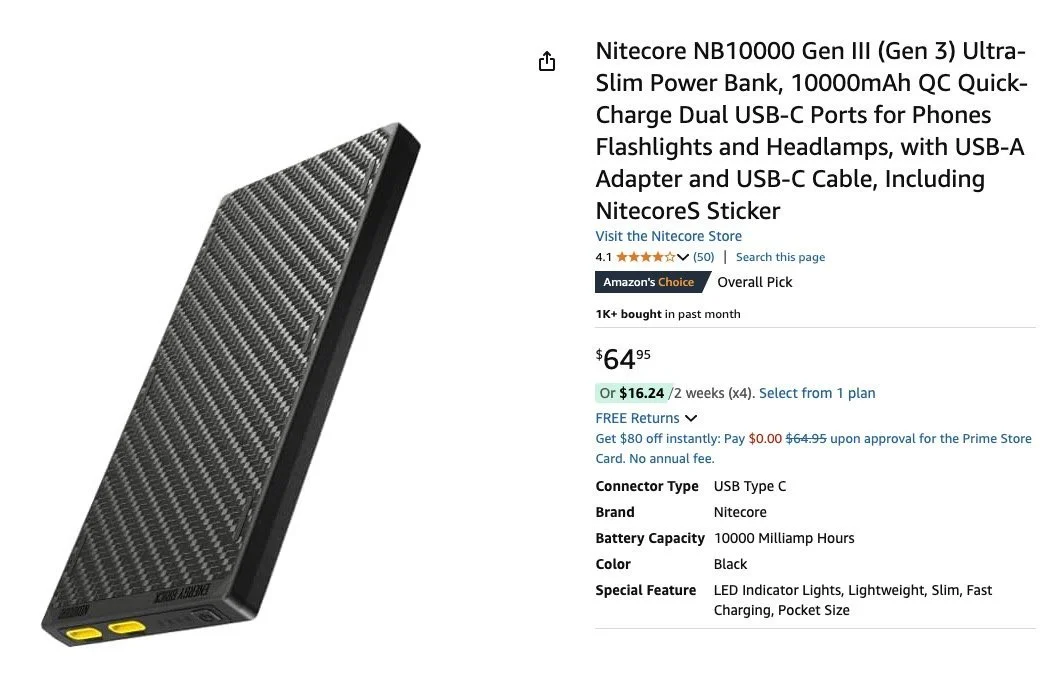
Update: as of 2024, this is about the lightest weight and most compact 10,000 mAh charger on the market. I don't have one yet, but it comes highly recommended by some pro guide friends.