Alpine Tips

2 tips for hot weather big walls
Headed to Yosemite or Zion in the summer to try a big wall? It’s gonna be HOT! Here are two lightweight and inexpensive things to bring to make your vertical camping trip a little more bearable.
This tip come from big wall expert Andy Kirkpatrick. Check out his excellent book on big wall climbing, “Higher Education.”
Yosemite valley or Zion in the summer can be a reflector oven on a big wall. If you find yourself in the heat, here are two easy ways to stay a bit cooler.
small folding umbrella
water mist/spray bottle
Between some instant shade and evaporative cooling, you can stay a lot more comfortable at that multi-hour belay.
Know what time of day your route will be in the shade, and plan strategically around that. Taking a nap in your portaledge in the heat of the day might be a great call.
That will give you some time to think about why most people like to climb in Zion and Yosemite Valley in the spring and autumn. :-) If you're in Yosemite in the summer and want to climb, consider heading to the higher elevation Tuolumne Meadows area.
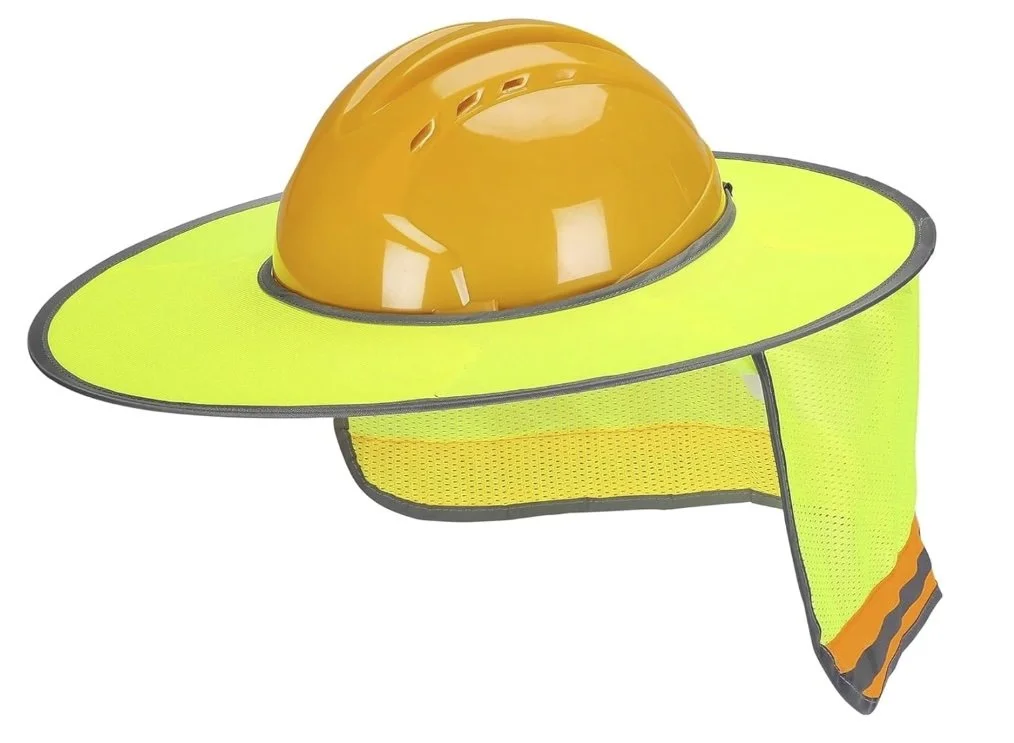
One more option to stay cooler: a sun brim for your helmet.

How to rack your aiders
Aid ladders always seem to be trying to trip you up. And when you're free climbing, you have to keep them tidy and out-of-the-way, but instantly accessible to transition back to aid. Here's a great technique to do just that, from expert climber Libby Sauter.
This tip was shown to me by Libby Sauter, expert climber and holder of the women’s team speed ascent of the Nose on El Capitan. Thanks Libby!
A good rule of thumb for just about any kind of climbing is never have anything hanging below your knees. So, what to do about those pesky aid ladders that always want to trip you up, when you're either gearing up at the base of the route, or transitioning between aid climbing and free climbing?
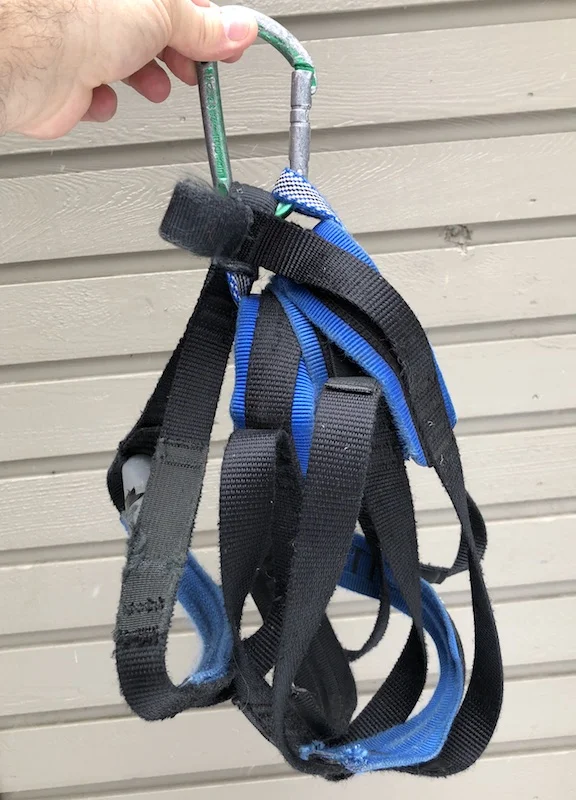
Here’s a crafty way to quickly roll up your aiders to get them out-of-the-way, yet make them instantly accessible to unroll when you need them. And if you do it right, there won't be any twists.
Take the second step of your aid ladder, and pass the hero loop under the step.
Repeat with the fourth step of the ladder, and again with the sixth.
Finally, clip the hero loop onto your aider carabiner. This should be a designated carabiner that always lives on the business end of your aiders.
You should have a nice compact bundle, looking like the photo below.
To deploy, just unclip the hero loop from the carabiner, and give a shake. The aider should fall down untwisted, ready to climb.
It’s a better show than a tell. Here’s a short video showing how it’s done.

Hauling directly from a Traxion pulley
Connecting your haul rope to the haul bags with a Micro Traxion (or similar progress capturing pulley) can make your life easier in a lot of ways. (Thanks to big wall expert Mark Hudon for this tip.)
Credits: This system is also known as the “far end haul”. I believe it was originally invented by legendary Yosemite dirtbag Chongo, and shown to me initially by Mark Hudon. Check out Mark’s great website for more on this.
Note the haul line going directly to the Petzl mini Traxion.
(Also note the haul line clipped in with a locker to the top part of the swivel as a backup.)
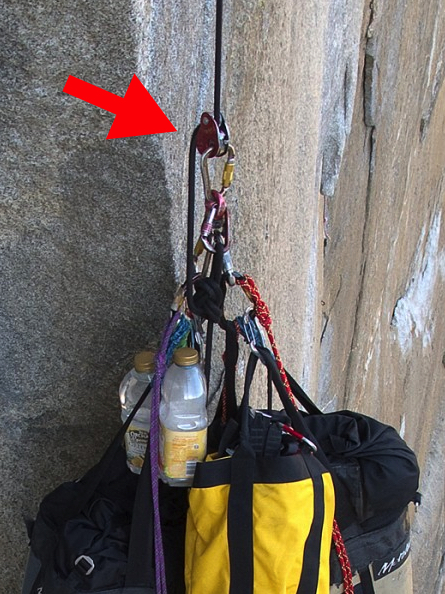
image: mark hudon
The traditional big wall set up to rig your haul rope to the haul bags is to pretty much connect them directly, something like this:
Figure 8 on a bight (or better yet, a butterfly knot, easier to untie after loading) on the end of haul rope
Locking carabiner
Swivel (optional but highly recommended)
Another locking carabiner attached to haul bag(s)
However, with the addition of just one more piece of (admittedly expensive) gear, you can make your life a whole lot easier in certain situations. All you do is add a progress capturing pulley, (aka PCP) like a Petzl Micro Traxion, to the locking carabiner upstream from the swivel, put your haul rope through that. Note that you set this up on the ground from the very first haul, and keep it on the system the entire climb.
Also note that you do not remove this PCP and use it as part of your hauling system, you need a separate PCP for that. (Yes, this sport is expensive . . .)
The rig looks like this:
Haul rope through Micro Traxion (make sure it’s threaded the right way, duh)
Micro Traxion to locking carabiner
Locking carabiner to top of swivel
Bottom of swivel to locking carabiner
Locking carabiner to haul bag(s)
Here’s a close up or one way to rig it. Note the haul line is clipped above the swivel with a locker as a backup to the Traxion. Docking cord is attached to the long haul bag strap with a quicklink.
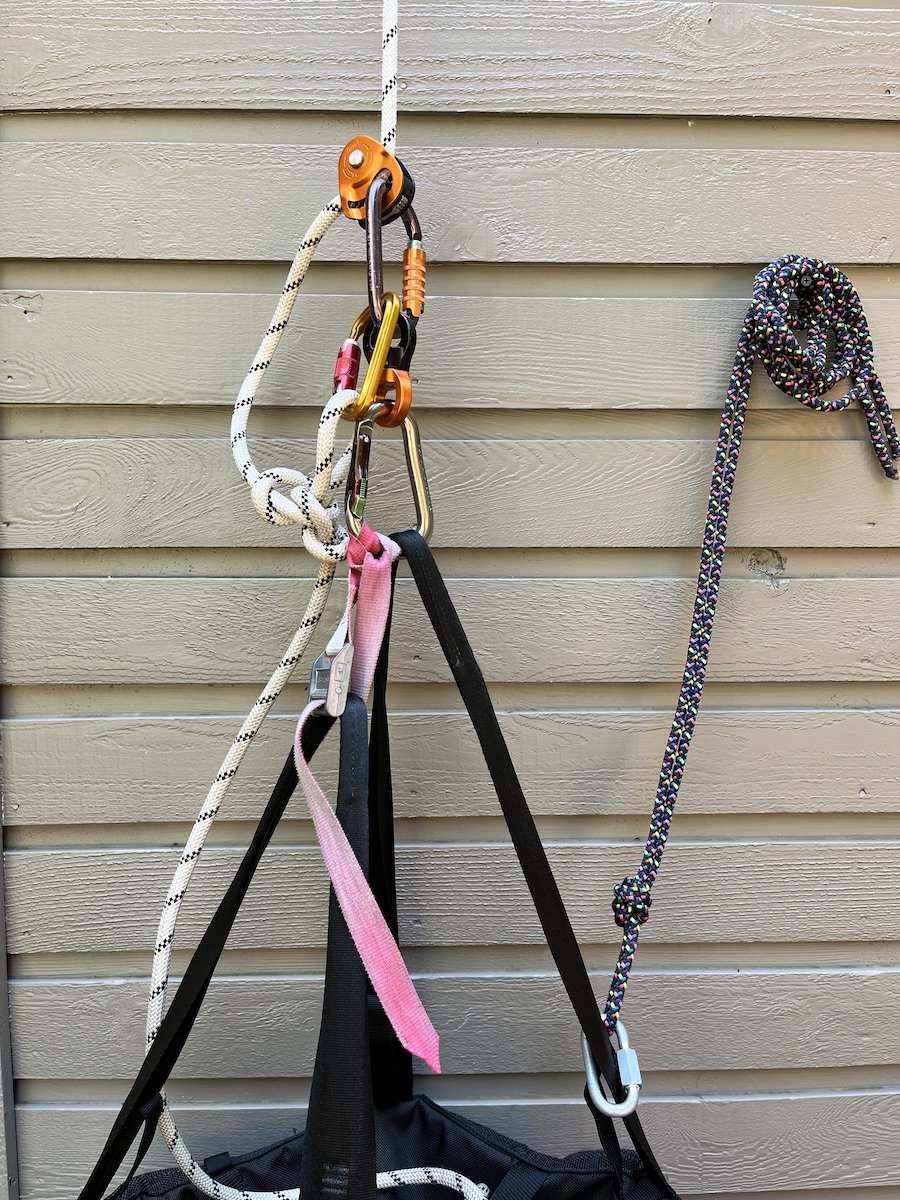
No, the teeth on the pulley do not damage the rope. That was my first reaction, isn’t the rope going to get shredded? But nope, it does not. (You ARE using a burly haul rope with a stout sheath, right?)
About the only downside to this system is that you’re adding one more bit of gear that costs about $100. But the upsides can be significant.
Here's a fancier way to set it up, from big wall expert Skot’s Wall Gear.
Here, Skot is using a pair of rappel rings (gold) along with a combination swivel and locking carabiner (appears to be the Director Swivel Boss from DMM). This makes a more compact set up, with zero chance cross loading the rings. Sweeeeet!

PHOTO: @SKOTFROMTHEDOCK, HTTPS://WWW.INSTAGRAM.COM/P/C2NMW-BY0-3/
The far end haul
Having a Traxion on the load also lets you set up what’s called a “far end haul”, which at first seems like some sort of sorcery. The far end haul system allows you to lift your load with a theoretical 2:1 mechanical advantage (MA) by pulling on the “far end” of the rope, rather than from the primary anchor. Here's a detailed article on how to set it up, along with some how-to videos.

But, even if you’re not soloing, it has a few advantages.
You never again need to futz with the old school “water bottle knot protector” that slides up and down the haul line and gets in your way. If you don't have a knot, you don't need a knot protector, right?
You can pull all the extra haul line through the Traxion before you release the bags from their docking cords, and use the extra haul rope to lower out the bags. (Remember to tie that back up knot after you pull all the extra rope through the Traxion; it’s easy to forget this,)
You never have a loaded/welded haul rope knot to untie.
The far end haul can minimize rope abrasion, because the haul rope doesn’t move.
If you have to haul from a point or over a ledge with a LOT of rope friction, you can instead far end haul and have zero friction.
You can easily move the bags around at the anchor; more below.
Simply by redirecting the tail end of the haul rope through a higher anchor point, you can generate a 2:1 mechanical advantage to unweight the bags. This lets you do various shenanigans like transferring the docking cord from one part of the anchor to another. And I can tell ya, if you’re a beginning wall climber, you are just about guaranteed to have some flavor of anchor fustercluck that will require this, ask me how I know this!
If you didn’t have this set up, unweighting the bags once they are settled on the anchor is probably going to be a significant pig wrestle. You want to avoid pig wrestling whenever possible.
Here’s a video by wall ace Mark Hudon who shows exactly how to do this. Rather ingenious, no?

What size haul bag should I get?
There aren't a lot of manufacturers, nor whistles and bells when it comes to haul bags. The main choice is what size. Surprisingly, you can get a lot more room for a very small increase in weight and cost.
I think the short answer to this is the largest size that you can comfortably carry. If you're under about 5’5”, the larger bags are going to have shoulder straps and waist loops that may not fit your body very well.
How long are the walls you're planning to climb? Are you heading up a short outing in Zion National Park, where you're probably going to be on the wall for maximum one night? Then you can use a smaller bag. Or, are you heading up El Capitan on an outing of more than about three days? Then you probably want the biggest bag you can manage.
Haul bag sizing and pricing is kind of an interesting situation.
Let's look at Metolius, one of the most popular brands. Their largest two bags are called the El Cap and the Half Dome. (Costs are as of Feb 2019)
El Cap: 157 liters, weight 3.6 kg, cost $229
Half Dome: 125 liters, weight 3.4 kg, cost $219
So, for only $10 more money, and a weight increase of only 0.2 kg, you get an extra 32 liters of storage! For me, that's a no brainer. I'm getting the El Cap.
Below: the Metolius haul bag line up. From left to right, Half Dome is #3, El Cap is #4.
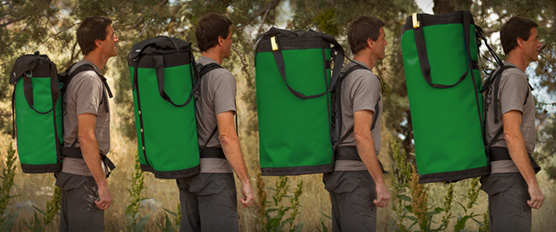
image: https://www.metoliusclimbing.com/haul_bags.html
Having some extra room in your haul bag, rather than packing everything into it like a Chinese puzzle, can make your life a lot easier.
And, of course, you don't want to fit everything in your haul bag anyway. For things like your portaledge, garbage bag, poop tube, wall bucket and your day bag, you probably will be using gear tethers anyway, like we described on this tip.