
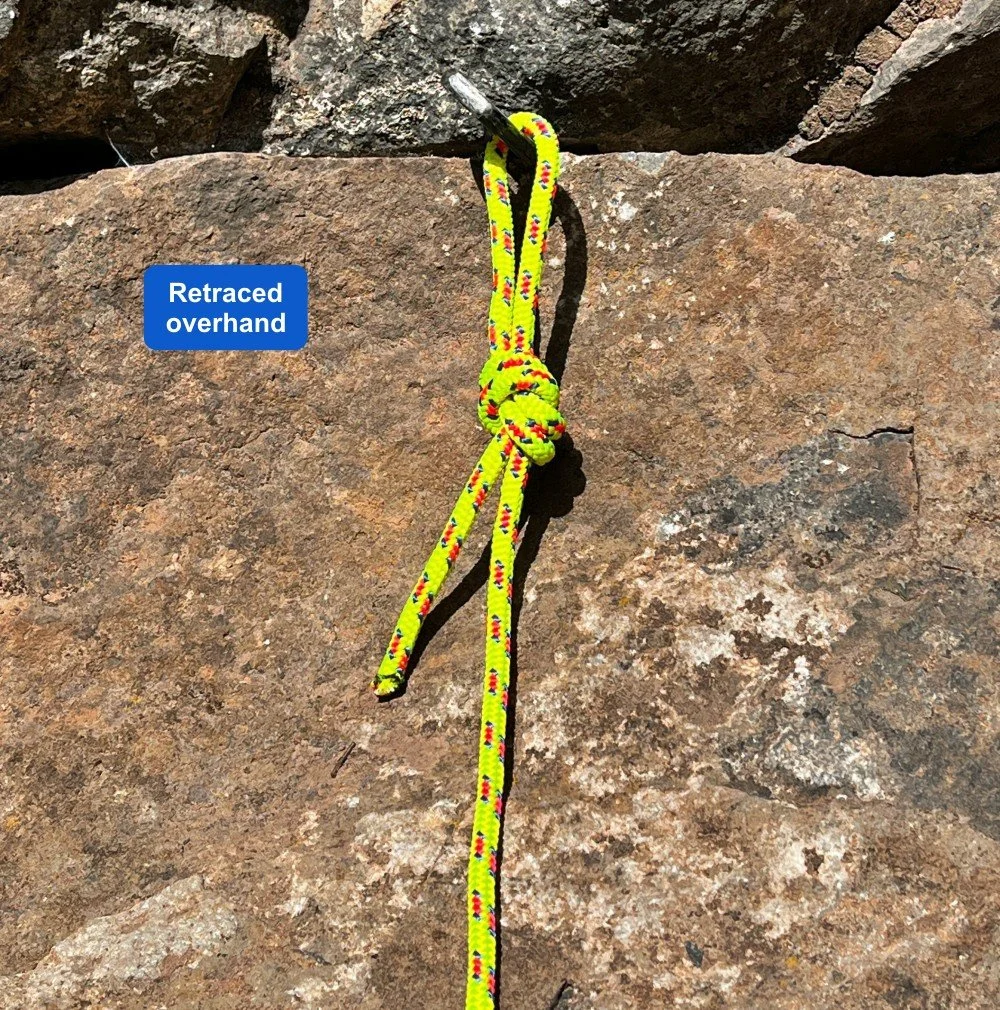
The retraced overhand knot

Premium Members can read the entire article here:

All climbers know the retraced figure 8. Meet the cousin: the retraced overhand.
Here I’m using it to tie a 6mm anchor cord through a fixed piton. You could tie a retraced figure 8 here as well and it would be fine.
However, the retraced overhand is a little simpler to tie, and it uses less material. So in this particular application, it may be a better choice.
It’s also is gonna be a little harder to untie after loading, so that's the trade off. In this case, you're leaving it behind for a rap anchor, so untying it is not an issue.
Being able to directly tie to fixed gear like this is one more benefit of carrying an open cordelette, as I detail in this article.
This knot is closely related, but a bit different from the “brotherhood” or “competition” knot. See the photo at the bottom of the page.
How to tie the retraced overhand knot
Start by tying a loose overhand knot about 1 foot / 30 cm away from the end of your cord.
Pass the end of the cord through the gear, here a fixed piton. (Check the piton to be sure it doesn't have any sharp edges.)
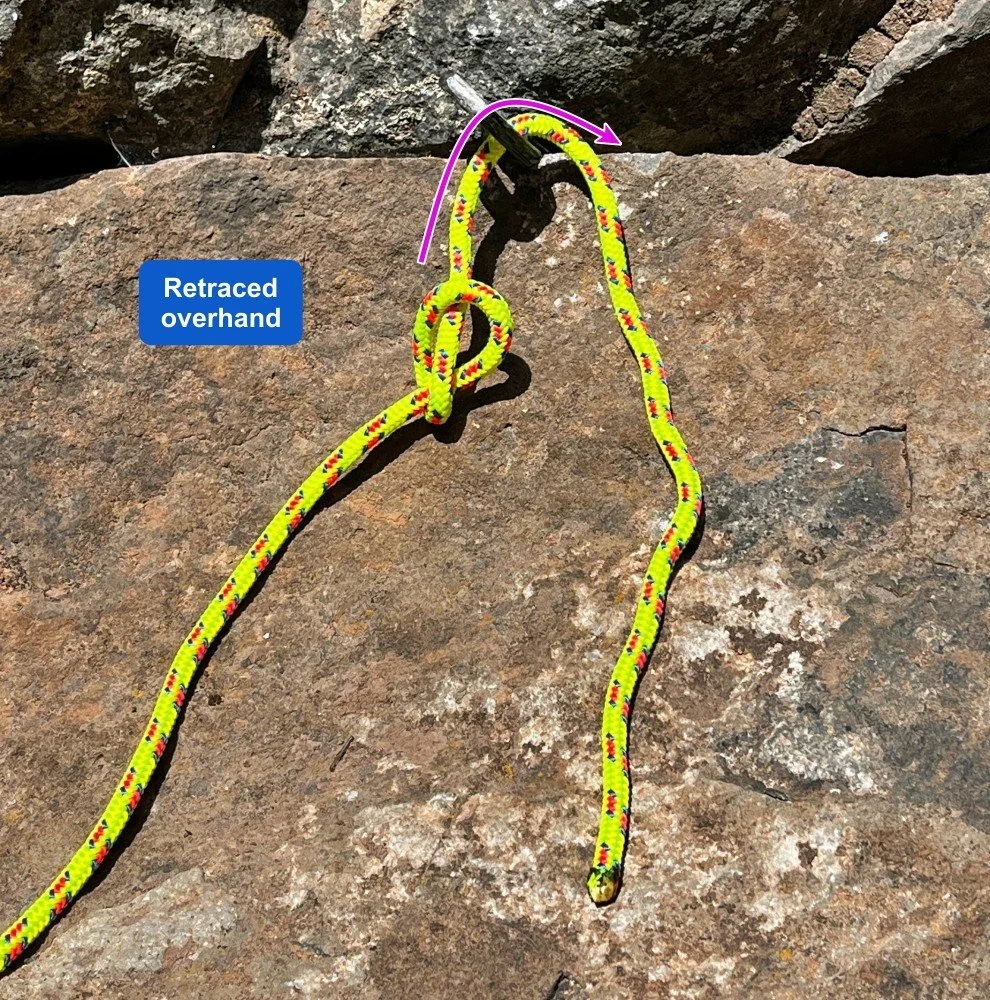
Start retracing the knot, very similar to how you tie a retraced figure 8.
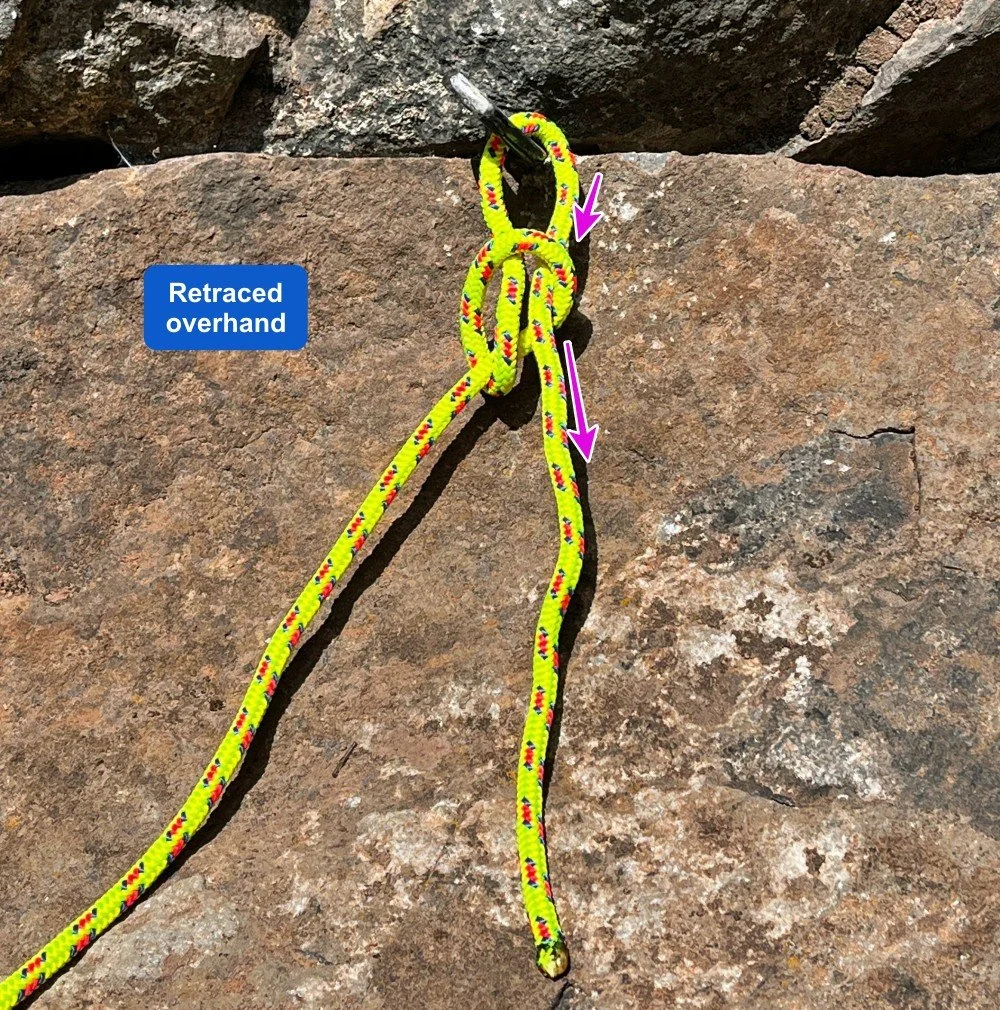
Continue tracing the overhand knot with the end of the cord.
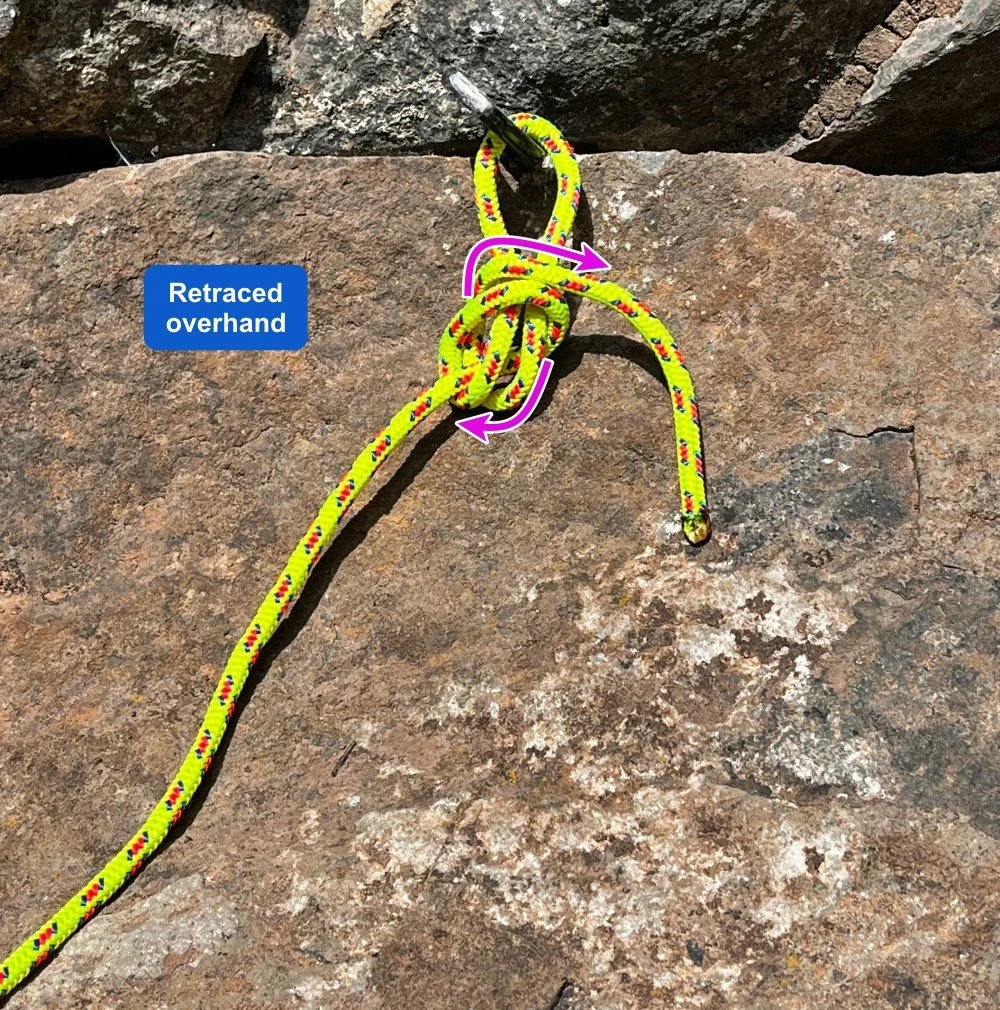
This is the shape of the knot before it gets “dressed and stressed”.
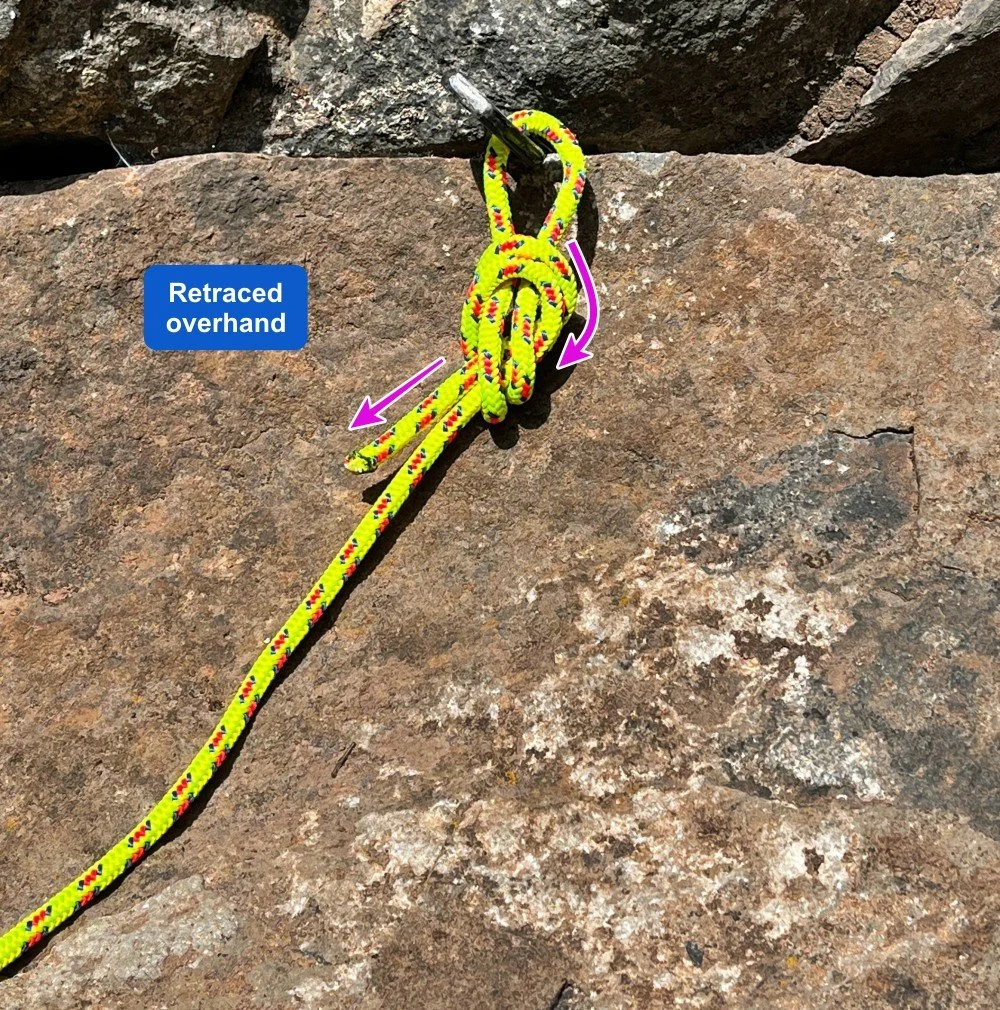
Dress the knot well - snug down all four strands, and be sure you have a tail of at least 3 inches / 8 cm or so.
(And yes, the loop in the knot could be even smaller if you wanted to use even less cord.)
Done!
What's a practical application for this, and how would you rig it?
What's the difference between this and the so-called “competition” or “brotherhood” knot, another flavor of the retraced overhand?
