

Premium Members can read the entire article here:
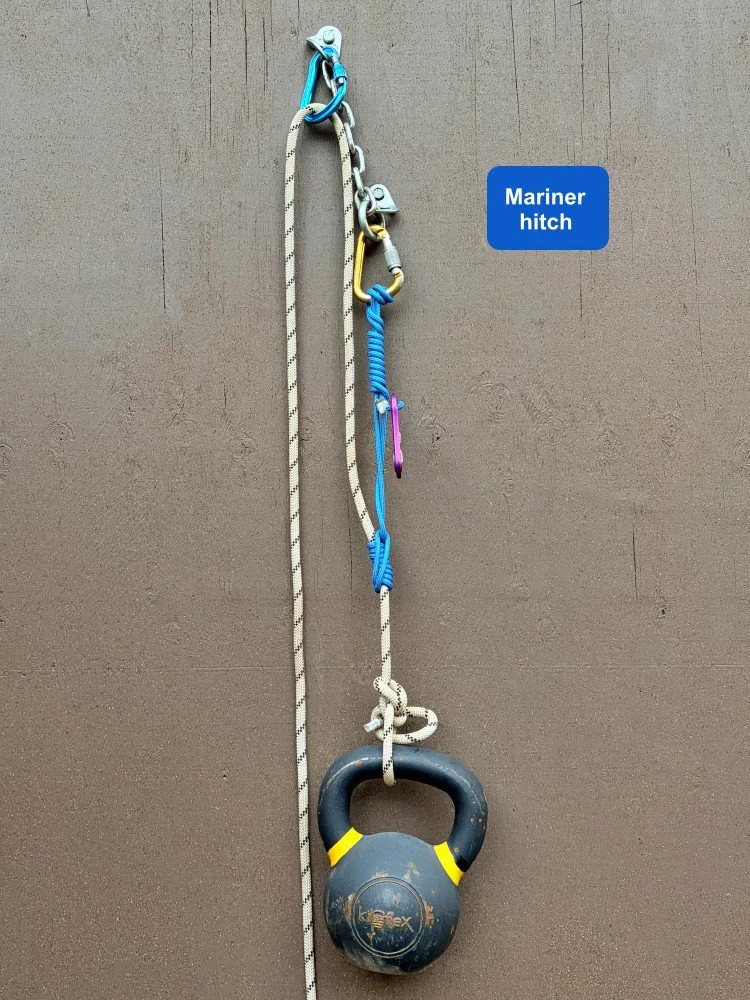
The Mariner hitch is a solid way to make a load releasable hitch.
The Mariner hitch is usually tied with a sewn sling or cordelette. You can release it in a controlled way, even with the cordage under load. This is extremely handy in many self rescue situations.
Knot Knerd Knote: This hitch is often misspelled as “Mariner’s”, implying it's related to sailing. (That's what I thought for pretty much forever.)
Fun fact, it's named after Wastl Mariner, the Austrian guide who invented it. So, it's singular, not plural, and is a proper name so it's capitalized.
There you go, we both learned something new today. =^)
“Why do we need a NEW releasable hitch?! I learned the Munter Mule Overhand (MMO) in my guide training / rescue class, and it seems to work pretty well . . .”
If you’re well-practiced with the MMO and can tie it with different materials (cord, sling, rope) and with your eyes closed, then high-fives to you, you probably don't need to learn this one.
However, in my opinion, the MMO has a few drawbacks. It's sort of a jumble of three different knots, as you can see from the name. It is a little tricky to tie, and because it's kind of a mashed-up mess when tensioned, it's hard to check, and to me looks goofy even when you do it right.
The Mariner hitch is faster to tie, cleaner looking, and easier to check when you're done. Plus, with a small improvement, you can add a bit more friction so it's easier to lower out a big load, see below.
Even if you’re a MMO fan, the Mariner is still a useful one for your toolbox.
Here's how to tie it. It's fun to play with, give it a try!
Notes on the Mariner hitch . . .
You can use a tied loop of cord or a sewn sling for the Mariner hitch. About the minimum length is 60 cm. A 120 cm (or longer) can give more control and length on the lower, which can be helpful. I find it quite tricky to tie a MMO with a 60 cm sling, so that’s a bonus for the Mariner.
Using a longer sling or cordelette is helpful in certain applications, such as passing an knot through a lowering system. Other applications, such as going to baseline in self rescue, a shorter sling can work fine.
A Dyneema sling is quite slippery, and releasing the load in slow, controlled way is harder. Cord, or a Dyneema sling with some sort of sheath on it, gives a little more grip. This is not necessarily a problem, more something to be aware of.
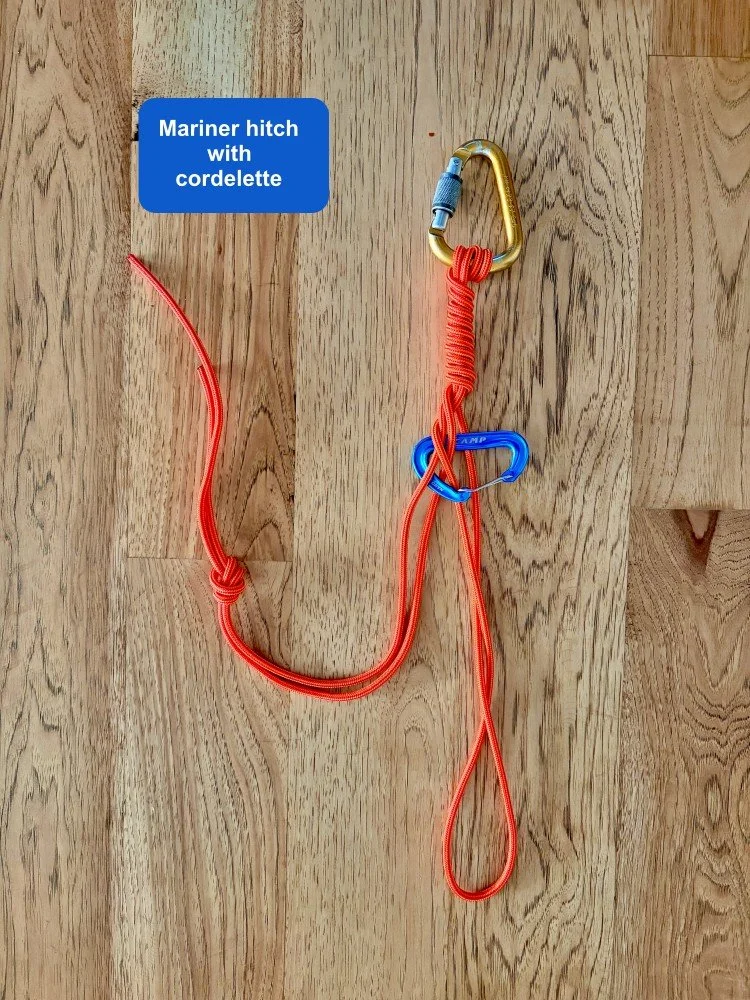
You can also use a cordelette to tie the Mariner. It can be helpful to keep it “open”, or untied. Here's my article on the open cordelette
It's best if the load remains constant. If it's unweighted, the hitch can start loosening up.
Clipping a carabiner at the end to secure the tail is crucial. I'll show two different ways to do this, see below.
You can combine the Mariner with a friction hitch. This works well for load transfers, see below. If you tie the Mariner with a 60 cm sling, you’ll need a second friction hitch cord.
Start like this.
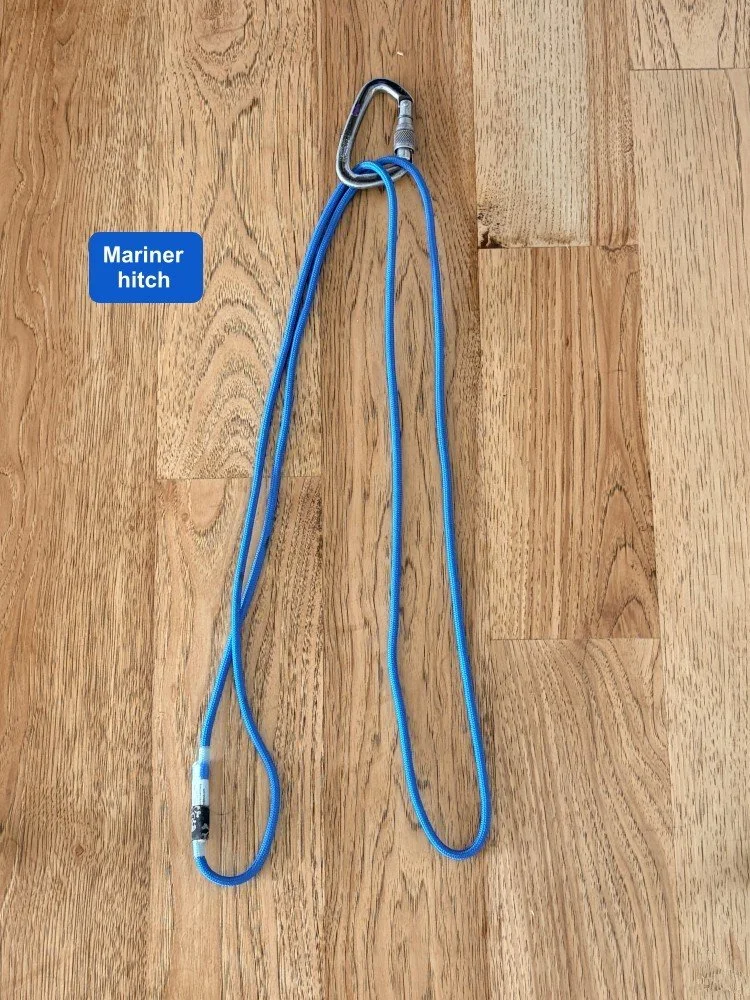
Wrap the sling once more around the carabiner.
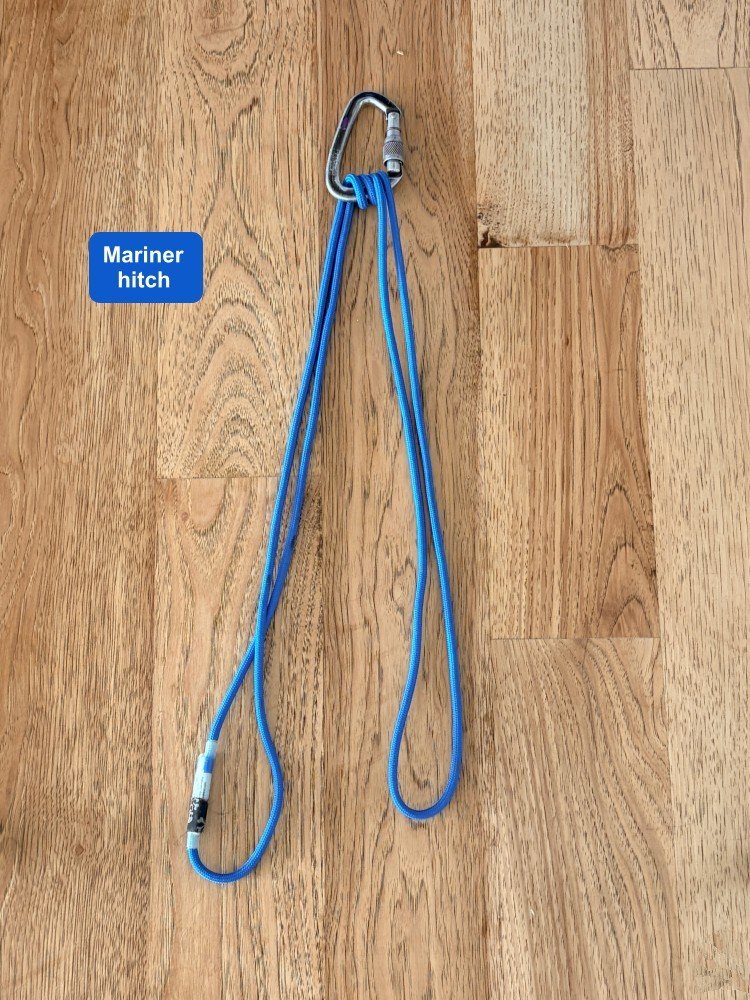
Wrap the cord around the doubled strands (downward, away from the carabiner). Try to keep the wraps tidy.
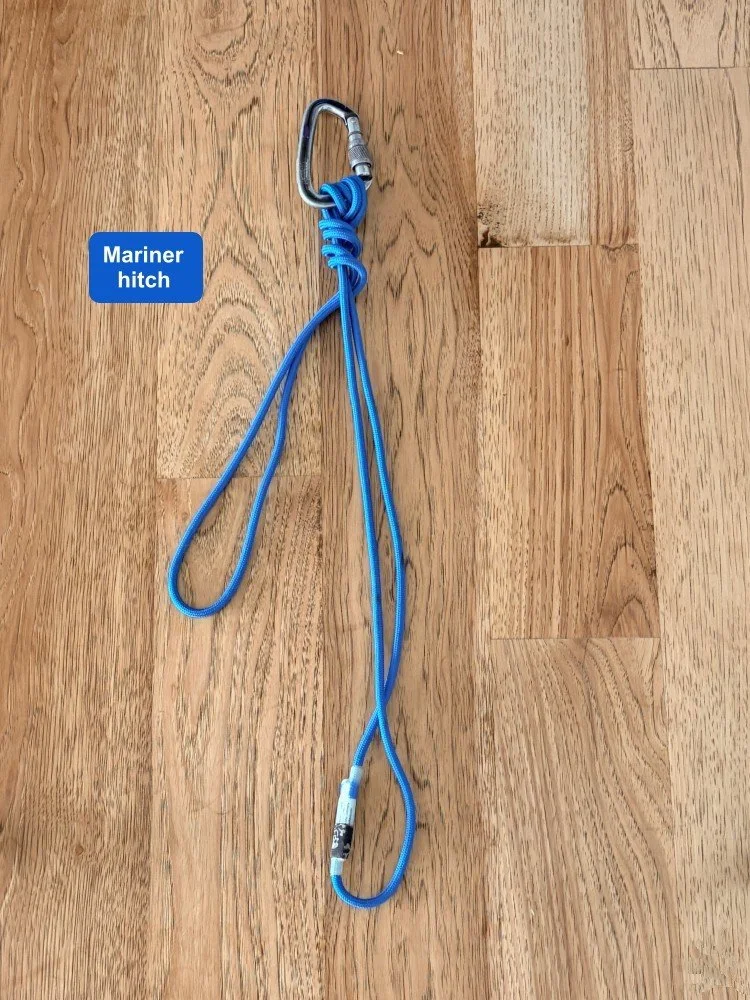
Wrap at least four times, or until you run out of cord.
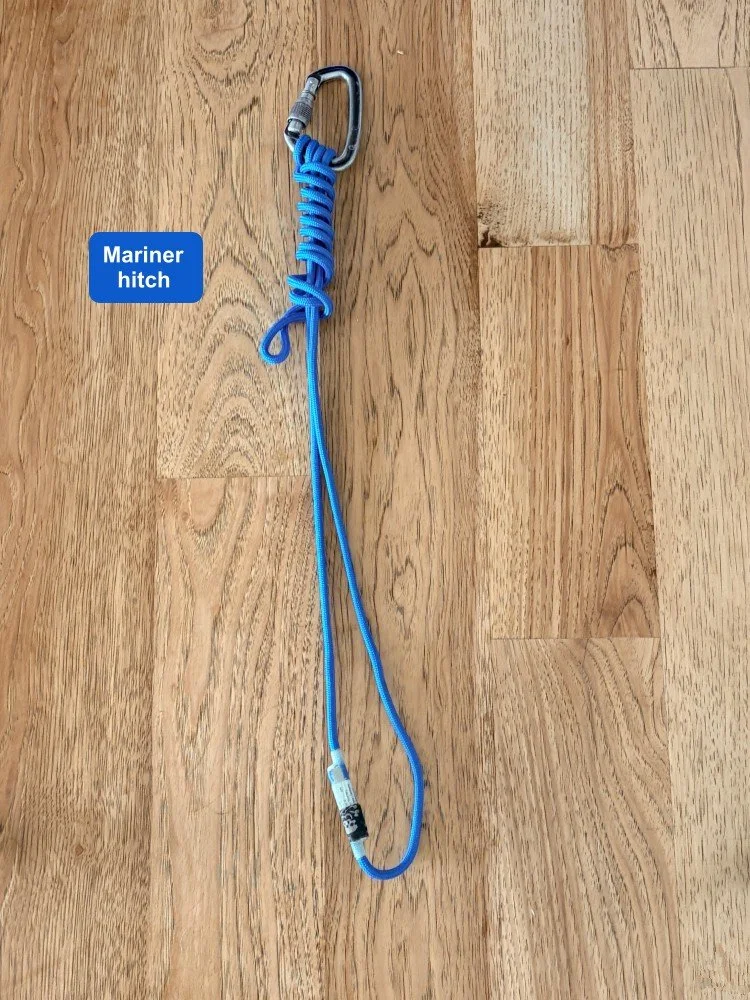
When you run out of material, secure the end of the sling.
There are a couple of ways to finish the knot. The traditional way is to pass the tail between the loaded strands and clip it with a carabiner. This works provided you have a constant load, but it's not completely secure as the carabiner could still pass through the strands.
Here's a method that I prefer:
Clip a carabiner to the end of the sling and then clip the carabiner between the two loaded strands. This ensures the spiral can’t unwrap.
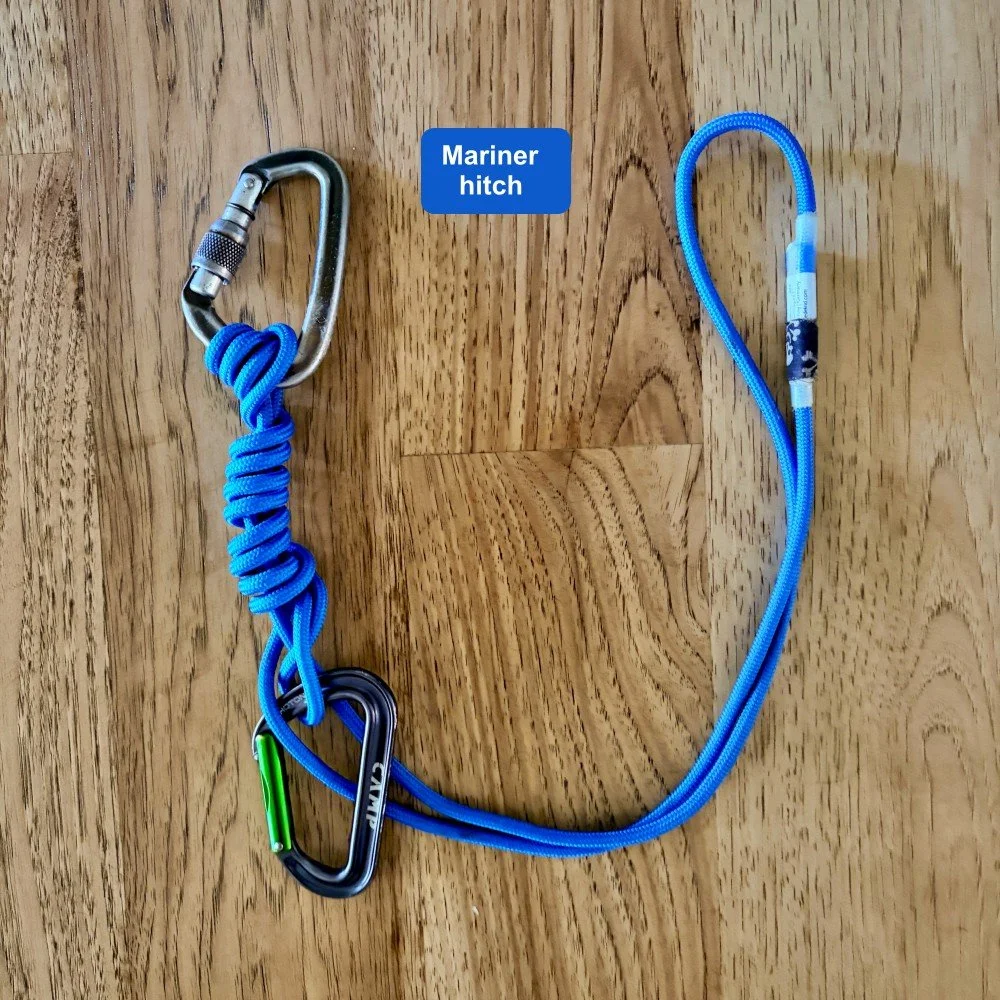
Combine the Mariner with a friction hitch
Most any releasable hitch (Mariner or other), is not very useful all by itself. You usually need a way to attach it to a loaded rope. You can do this one of two ways:
Tie a short friction hitch cord onto the loaded rope and clip the Mariner to that.
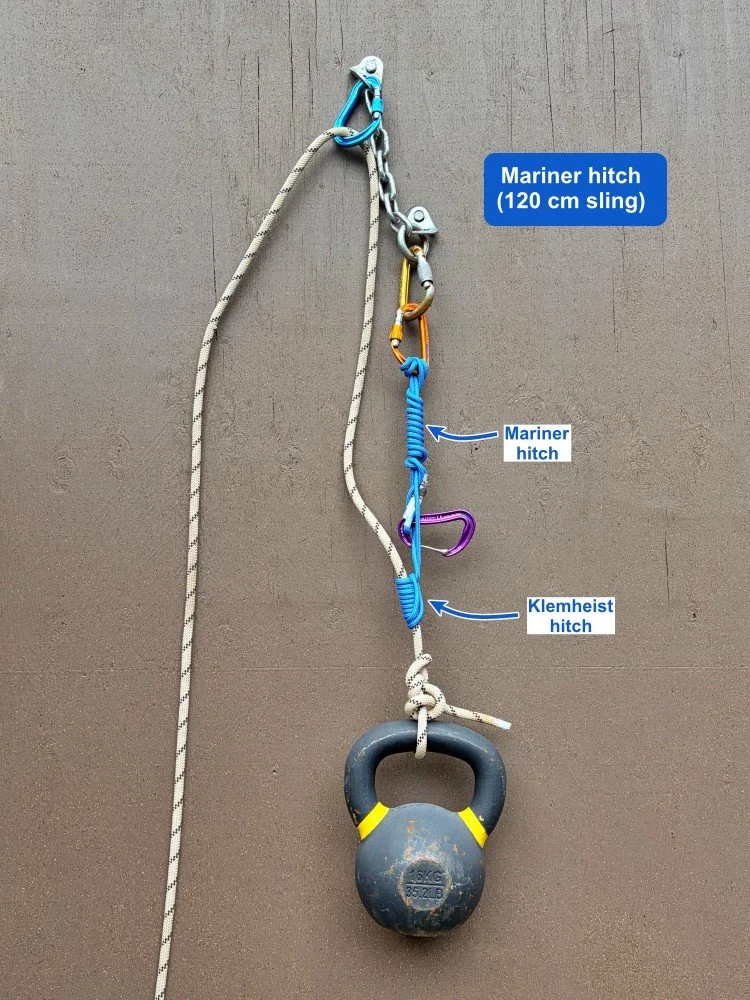
With a 120 cm (or longer) or even a cordelette, combine the Mariner hitch with a klemheist or other friction hitch.
This makes a combination rope grab on the load strand, and releasable hitch on the anchor. Very helpful for many aspects of self rescue, such as going to baseline, passing a knot through a lowering system, etc.
Note: You might be tempted to use the blocking carabiner for the Mariner hitch to clip to the short friction hitch cord. You'll probably only make this mistake once before you discover that that makes a non-releasable system, whoops! You need a second carabiner, ideally a locker, to make this work.
Note that that 60 cm sling can work okay in some applications, like maybe going to baseline, and not so well in others, such as passing a knot. Like for all self rescue techniques, you absolutely need to practice this in a controlled environment close to the ground before you ever try it for real.
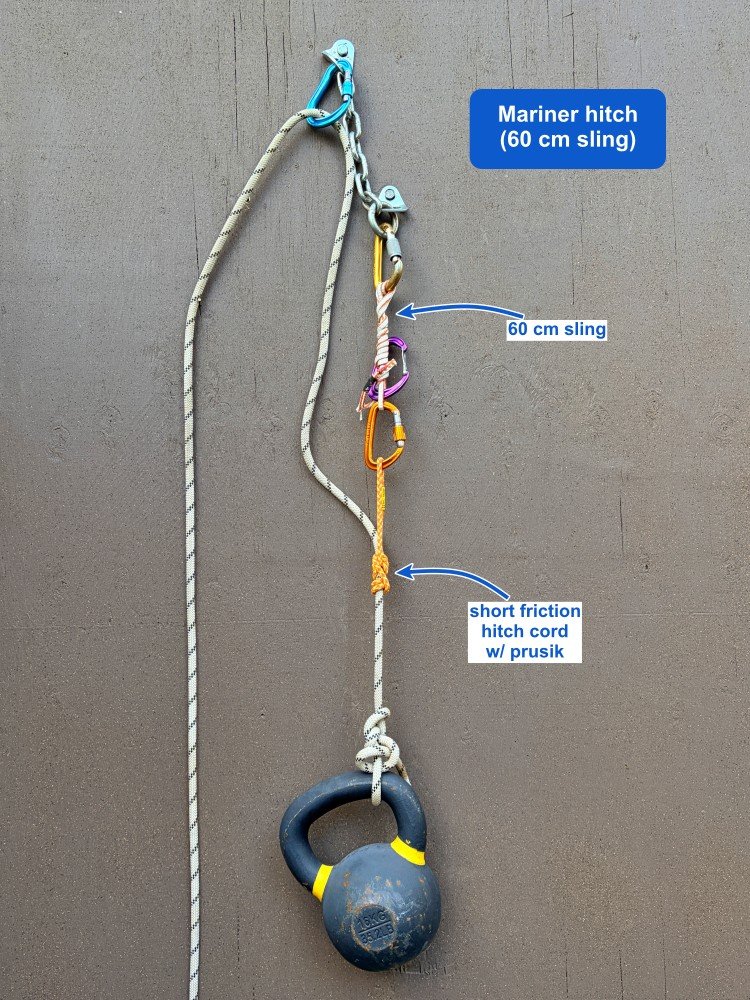
Here's a close-up of the Mariner hitch on a 60 cm sling attached to a prusik.
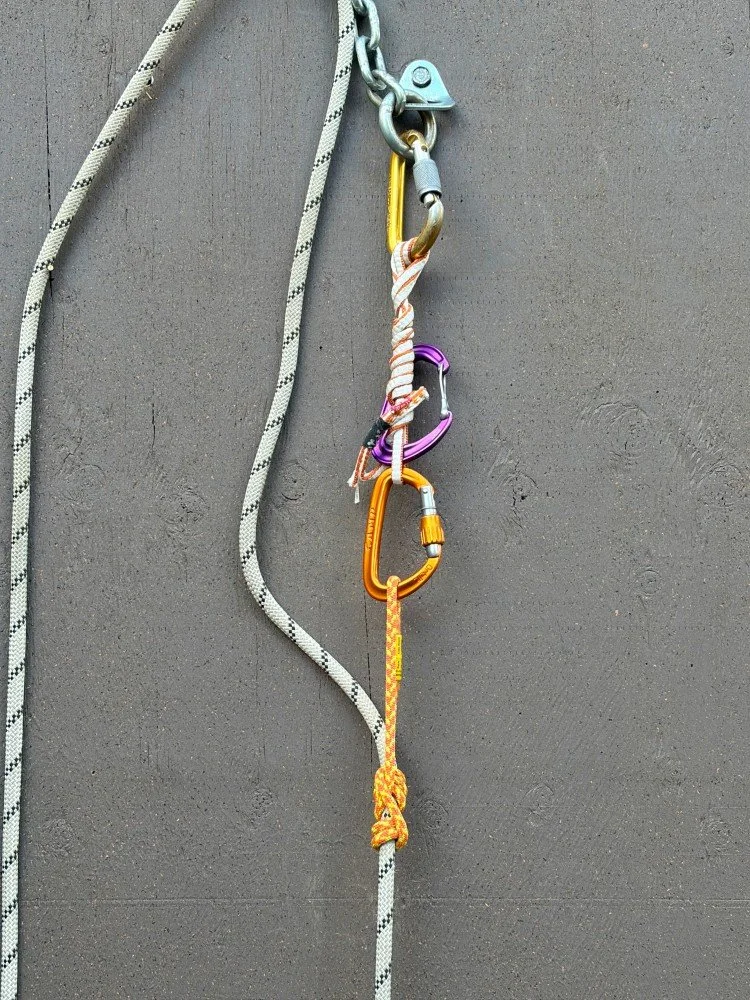
Here's the Mariner hitch with a 120 cm sling. The extra length lets you tie a friction hitch on the load, strand, here an Klemheist.
You can also use a cordelette.
Want to see a video of how to release a Mariner hitch under load?
How does the Mariner compare to the Munter mule overhand (MMO)?
What's a simple way to add additional friction for lowering an extra heavy load?
